CODESYS applications – PMX as CAN-Master with Can sensor(Zila)
This is a quickstart guide on starting CODESYS applications for PMX. Basic experience with CODESYS is assumed. Experienced users are free to differ. Further help is available in the examples that are normally installed on the desktop when the PMX package is installed and in the online Help for the package. The required files are located on the "PMX CODESYS" CD included with delivery of every PMX containing CODESYS, or they can be downloaded from the support page of hbm.com.
In this example PMX is used as CAN-master and the measuring values (humidity and temperature) are collected via the PMX CANopen interface of PMX from a connected CAN-sensor(Zila). A WebVisualization, created under Codesys show the measurement in a graphical display. The measuring values (humidity and temperature) get connected additionally to calculated channels in the PMX.
Create Codesys project
Open Codesys development software
Select ![]() under the button “Basic Operations“, choose a project name and confirm with “ok”.
under the button “Basic Operations“, choose a project name and confirm with “ok”.
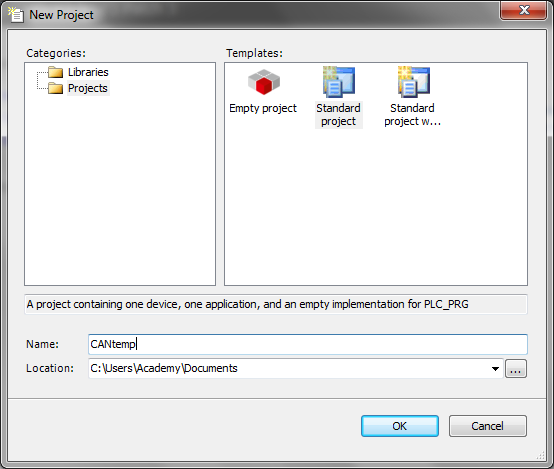
Choose „Standard Project“ in the following window and select the PMX System in the column Device
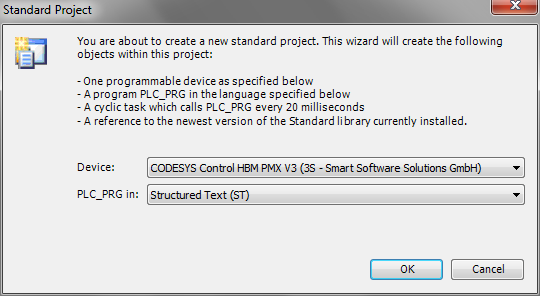
This selection will lead to the following Screen
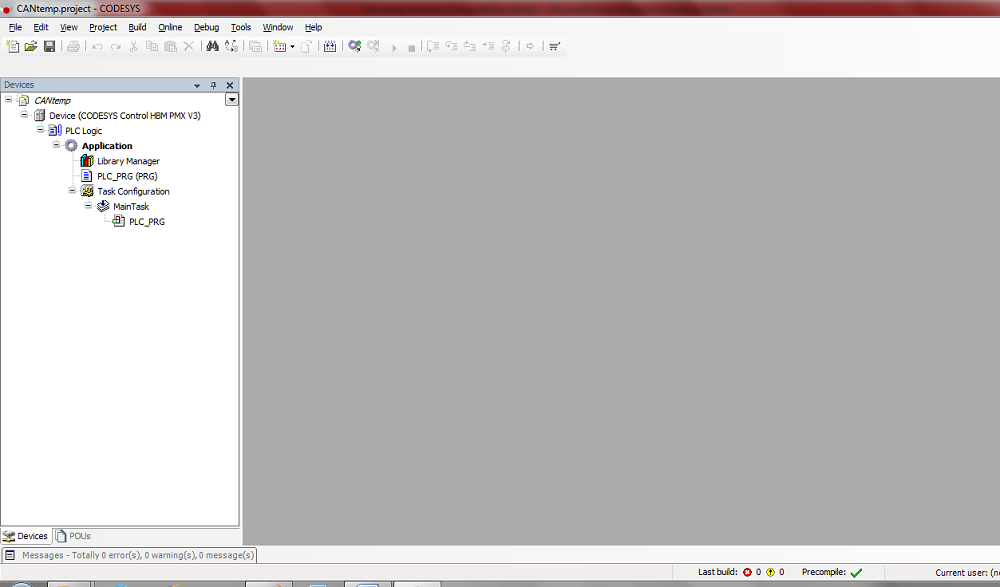
Adding a CANbus and a CANopen_Manager
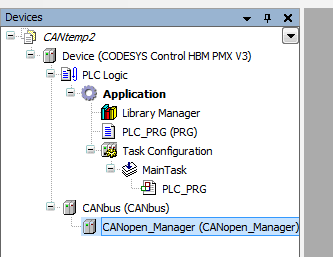
Right-click on „Device (CODESYS Control HBM PMX V3)“ choosing „Add Device“ to select the CANbus. The CANbus shows up in the overview.

Right-click on „CANbus“, choose „Add Device“ again, to select the CANopen_Manager. The open_manager shows up in the overview as well.
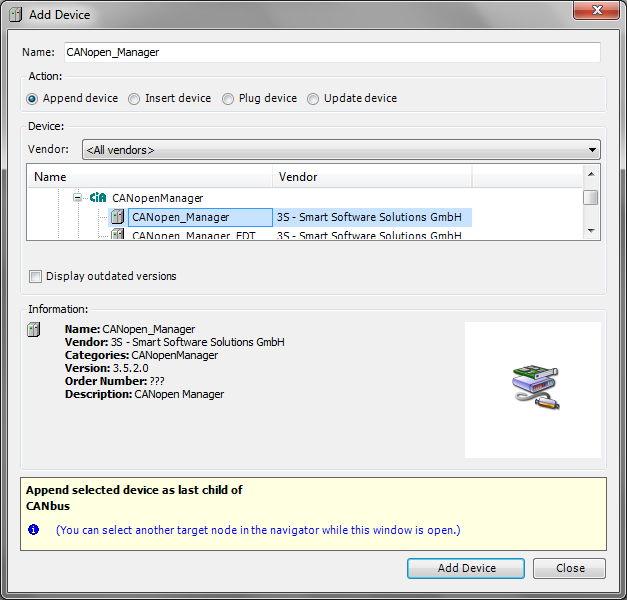
Overview as follows
Install a CAN Sensor (Zila Sensor)
Select „Tools“ in the menu

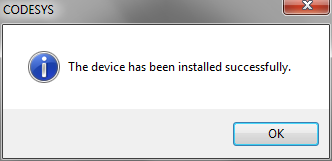
Select „Install device“. Select the source of the Electronic Data Sheet file (here: KASCAN30.eds uploaded from an USB-Stick. Watch out for the correct file format: *.eds) and open the file. The following window shows up as a confirmation of the Setup
Activate Gateway
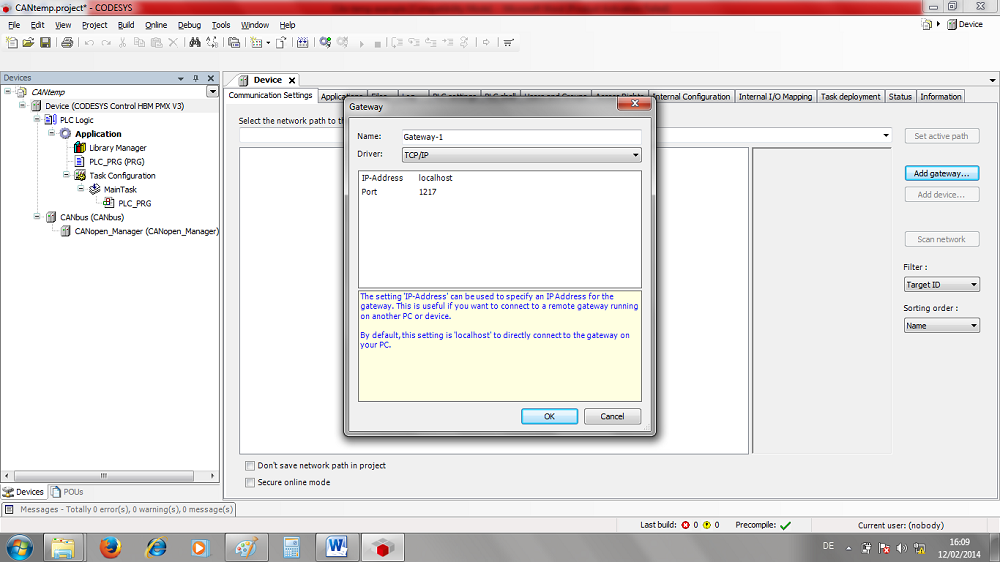
Double-click on „Device (CODESYS Control HBM PMX V3)“. On the right side a window pops up to select a Gateway. Klick „Add gateway“ to add a Gateway
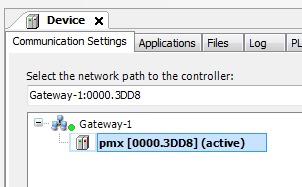
By double-clicking on the path or through the Button „Set active path“ the Gateway can be activated. The Gateway is displayed in bold letters with the attachement (active)
Add and configure CAN sensor
Right-click on the CANopen_Manager, select „Scan for Devices“. In the example with a Zila Sensor the following window shows up. Select button „Copy to project”.
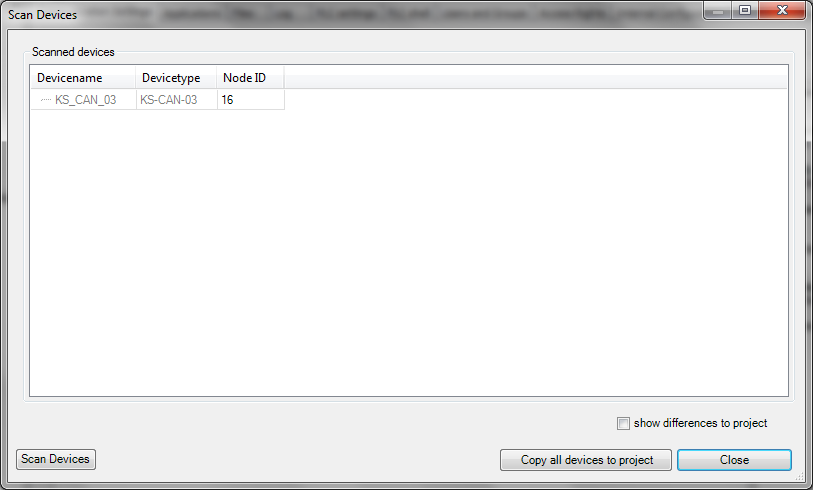
The Sensor is shown in the overview on the left side

Choose the correct Baudrate (here: 100 000) in the CANbus tab (double-click on CANbus)
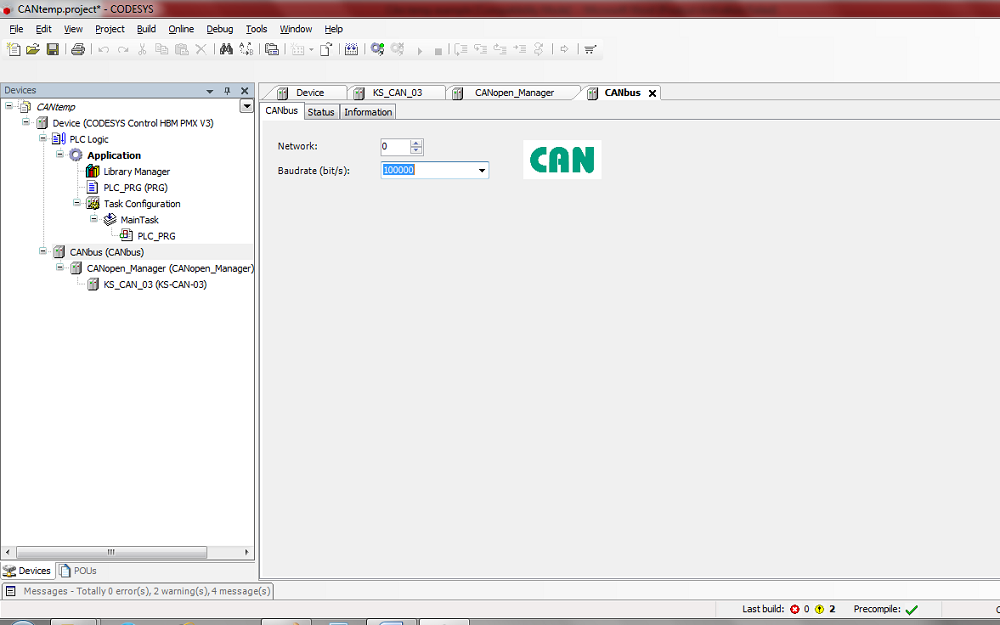
Double-click on the sensor (here: KS_CAN_03). In the tab “CANopen I/O Mapping” the Input channels are displayed
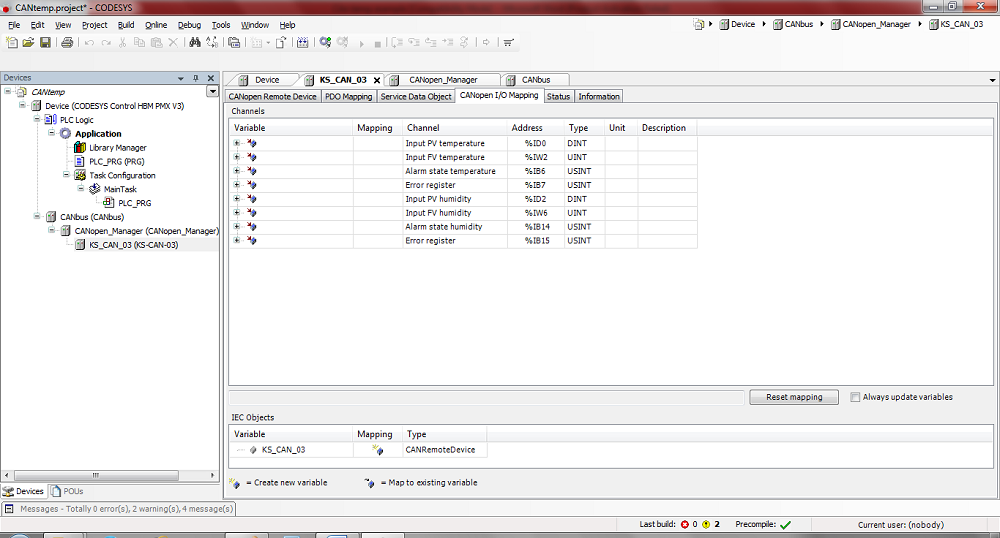
Declaring of variables and I/O Mapping
Select „PLC_PRG“ and declare the necessary variables (here: temp und hum)
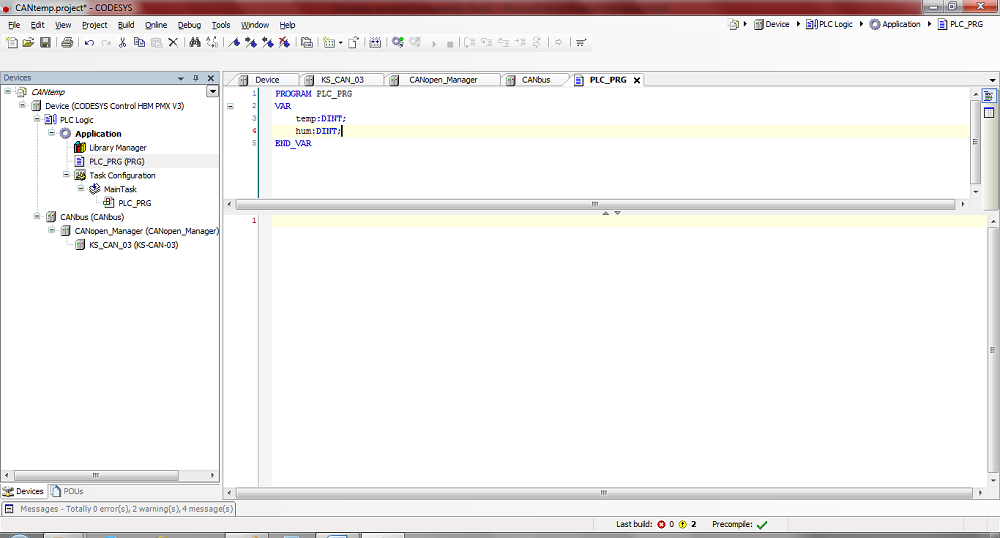
The variable can be mapped on the internal channels in the tab “CANopen I/O Mapping”. Therefore select the button shown below in the column Variable

and select the declared variables. Repeat these steps for all variables
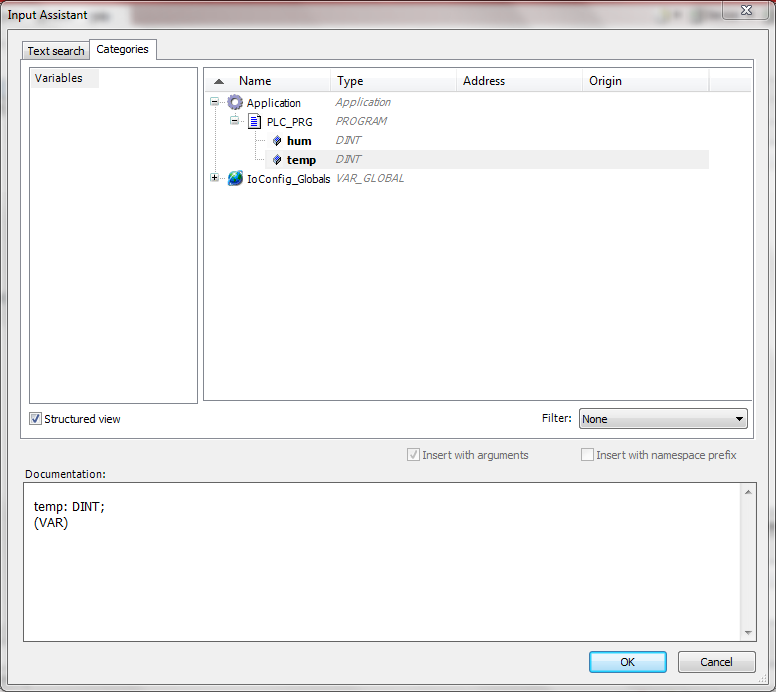
NOTICE: Remember to set the Checkbox „Always update variables“! (see below)
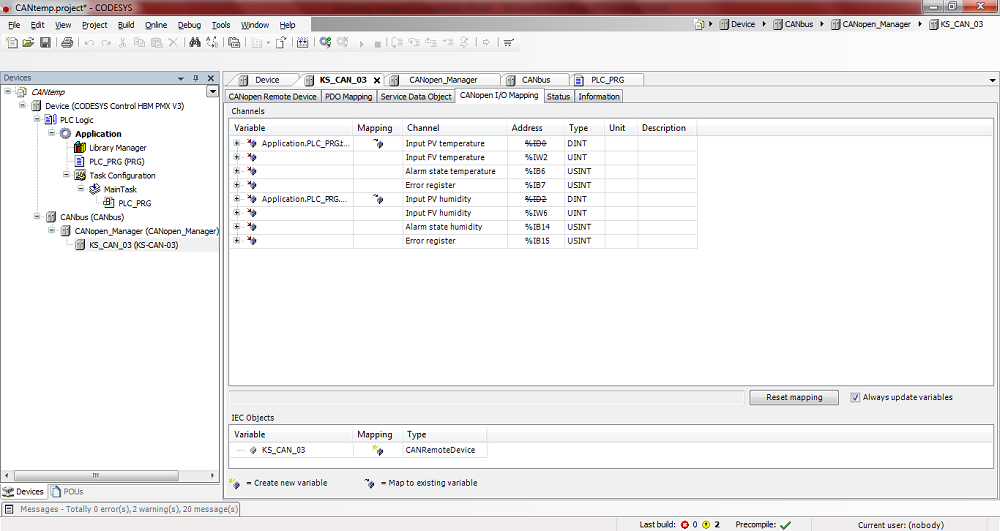
First Login-Test
By clicking on Login the programm can be tested.

The overview should look like this.
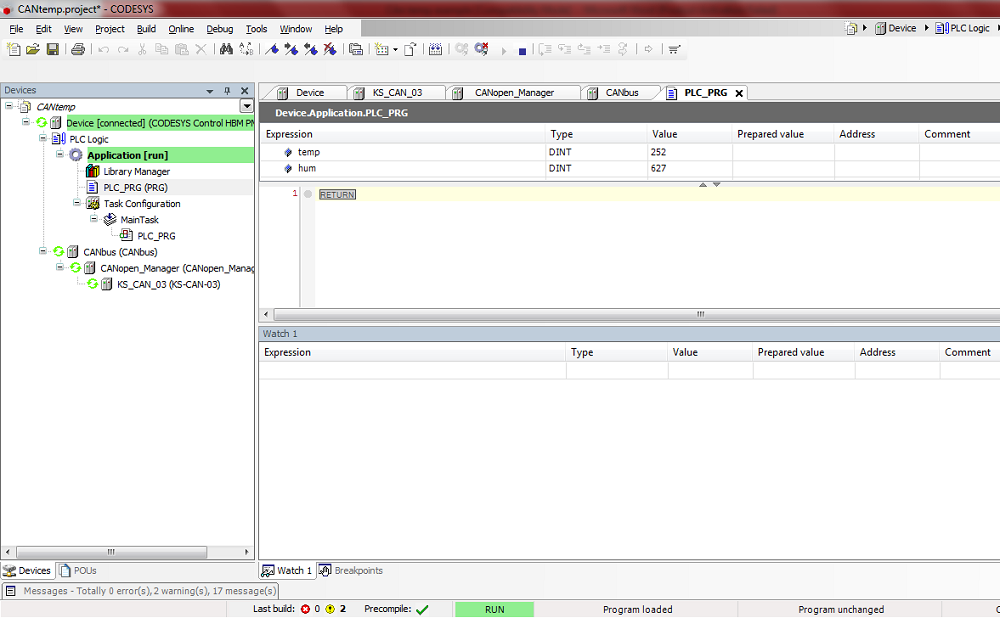
Define Main Task
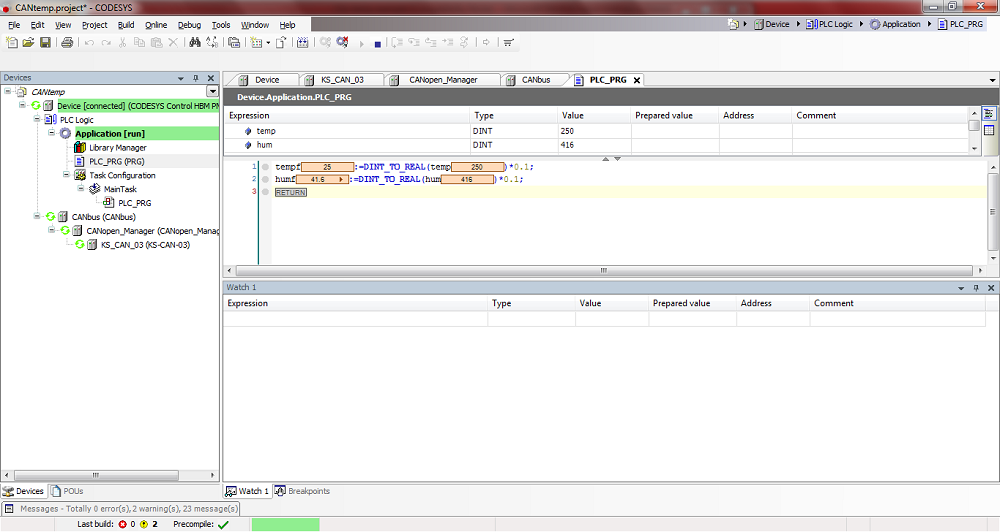
In „PLC_PRG“ the variables can be declared and used afterwards (here: tempf und humf).
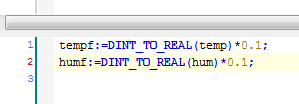

Double-click on „Device (Codesys Control HBM PMX V3)“ and choose the corresponding channels in the tab „I/O Mapping“ (here Codesys Output 1 and 2).
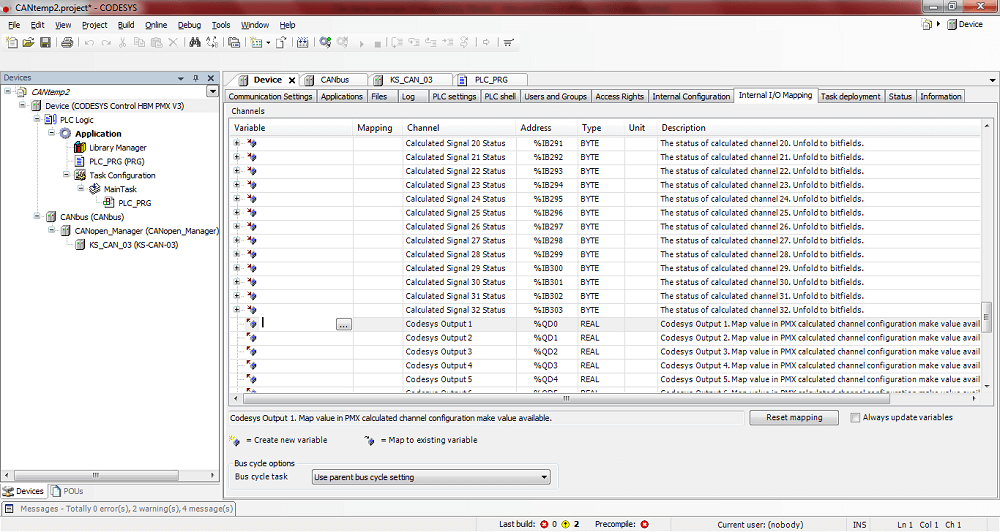
Select the variables afterwards.
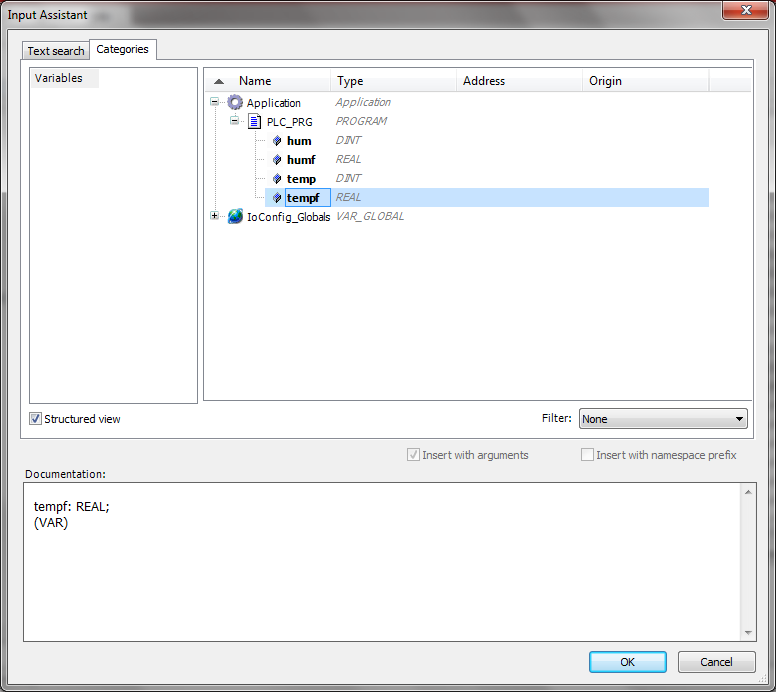
NOTICE: As mentioned before, remember to set the Checkbox „Always update variables“! (see below)
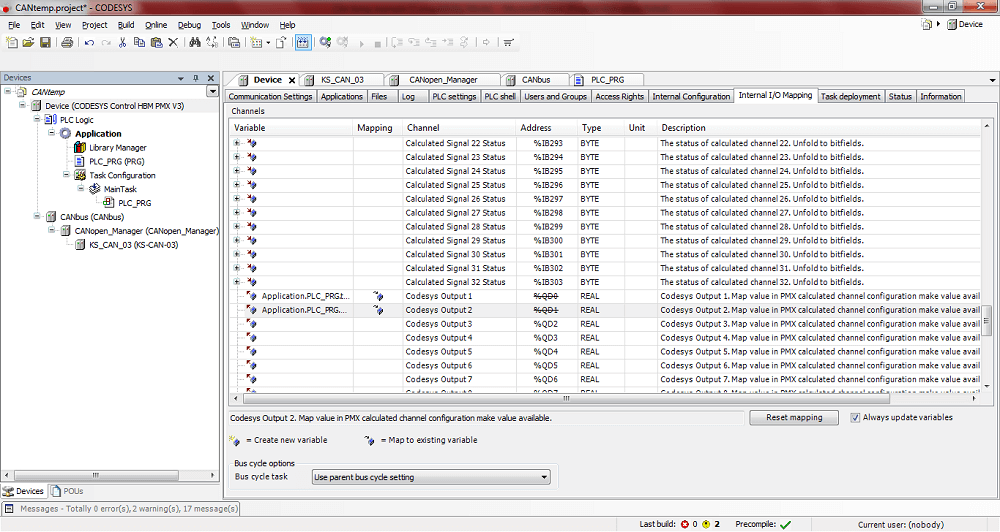
After Loging in the overview should look like this.
Browser Configuration of the PMX System
Load PMX in the browser (pmx/) select „Administrator User Level“ and choose a „Calculated Channel“

By clicking the + button a function type can be selected (here: Connection with delay)
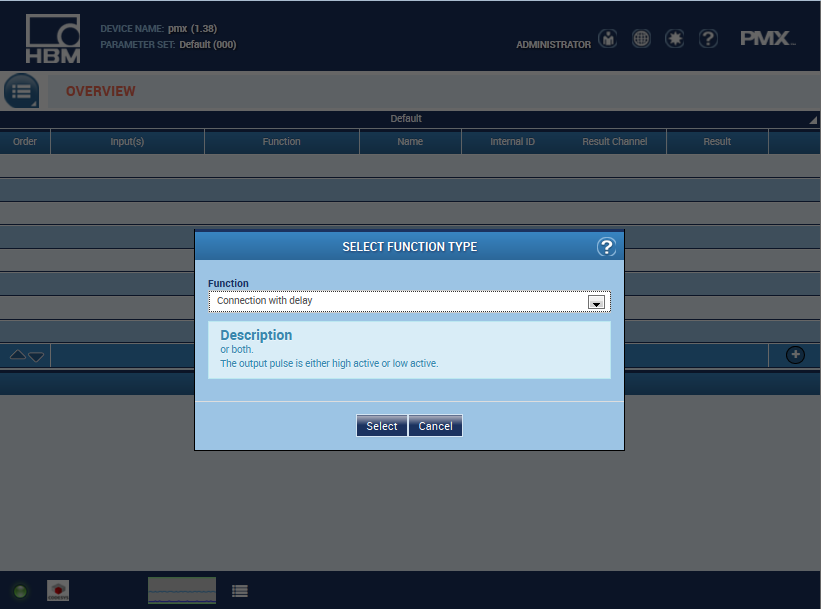
Select the In- and Outputs (here: Input=CPU Channel 1; Output=Calculated Channel 1). Further a name as well as a unit can be declared.
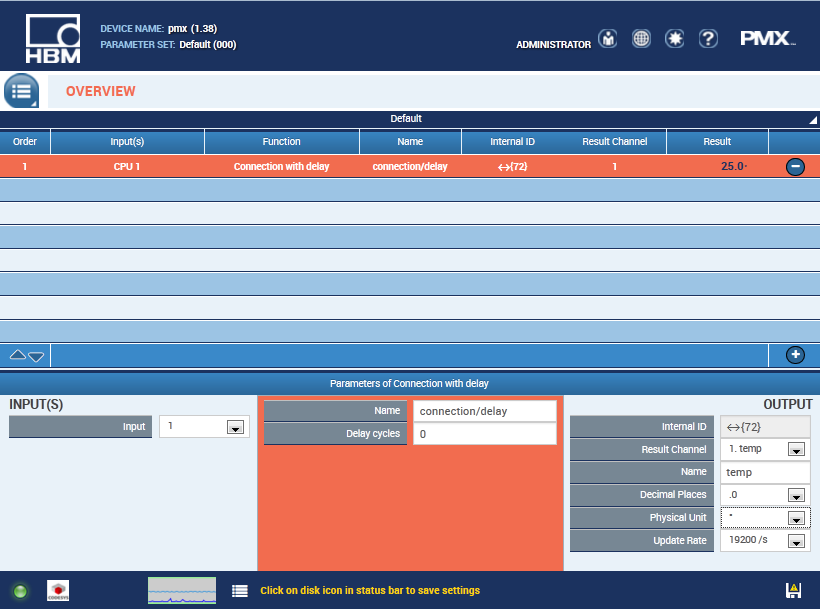
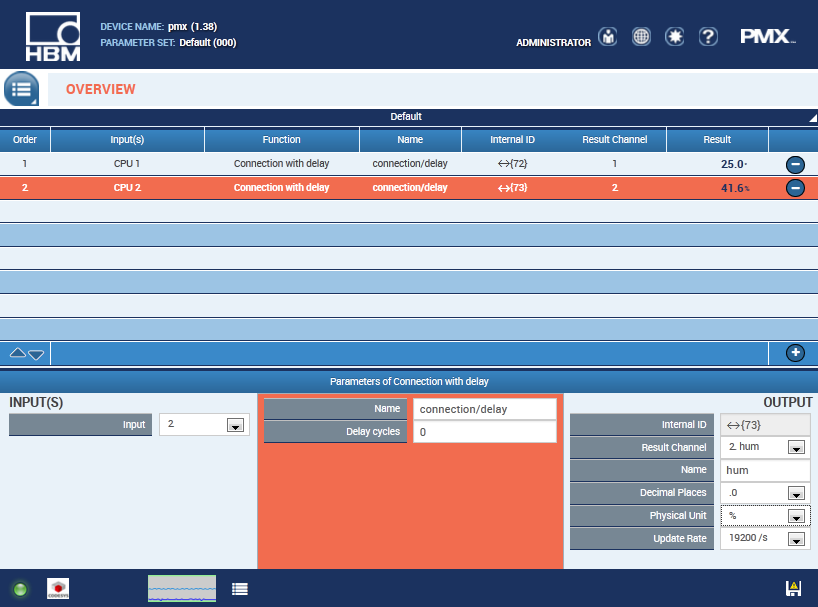
Repeat the steps for further variables
Visualisation in Codesys and the Webbrowser
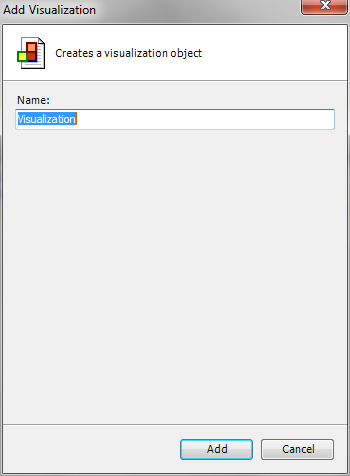
Right click on „Application” to add a „Visualisation“ via „Add Object“.
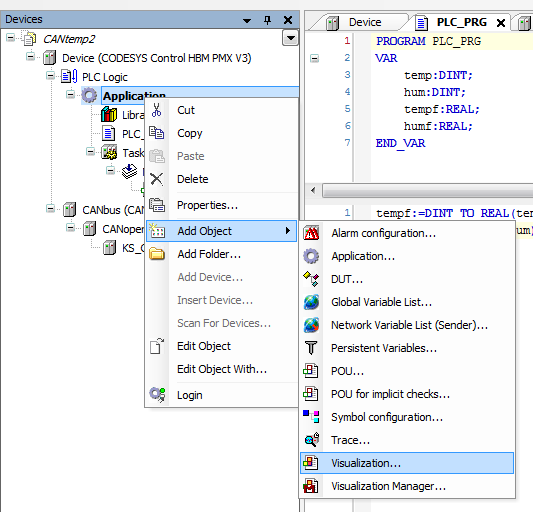
The following dialog appears
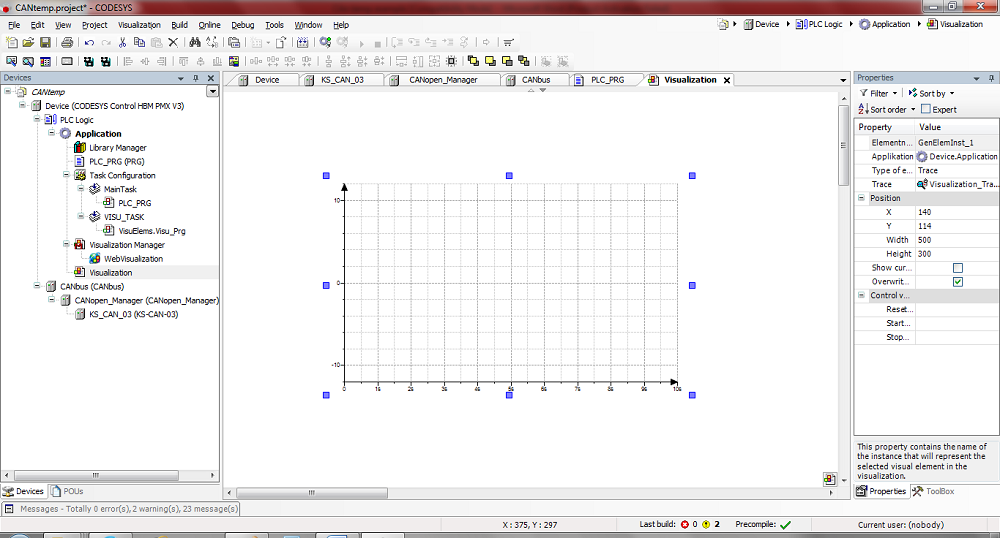
With the Toolbox on the right side of the dialog, several grafical elements can be added.
Special Controls ⇒ Trace – adds a coordinate system, signal over time.
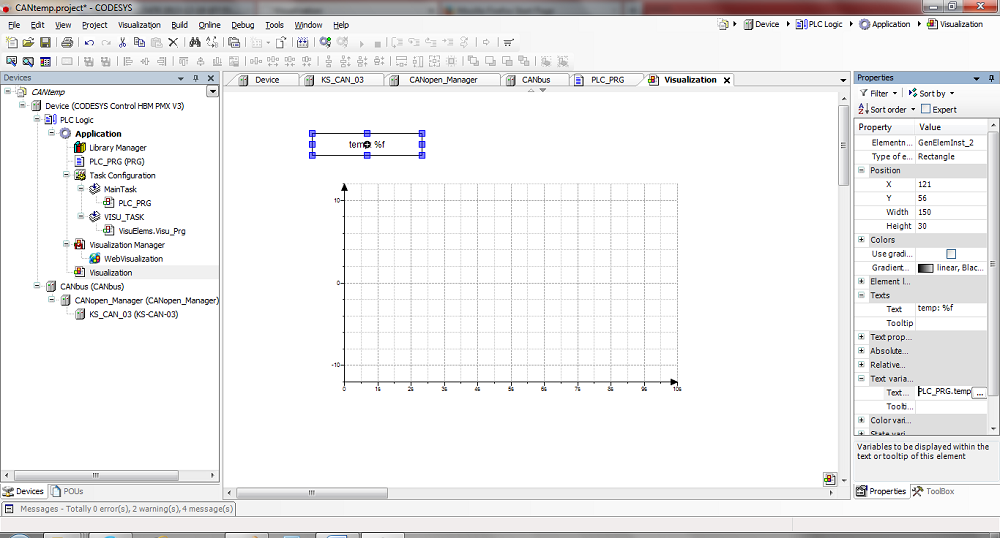
Rectangle ⇒ adds a rectangle, in which varables can be displayed. This has to be named (here: Text= temp%F; Text variable= tempf) and the variables have to be declared under „Text variables“.
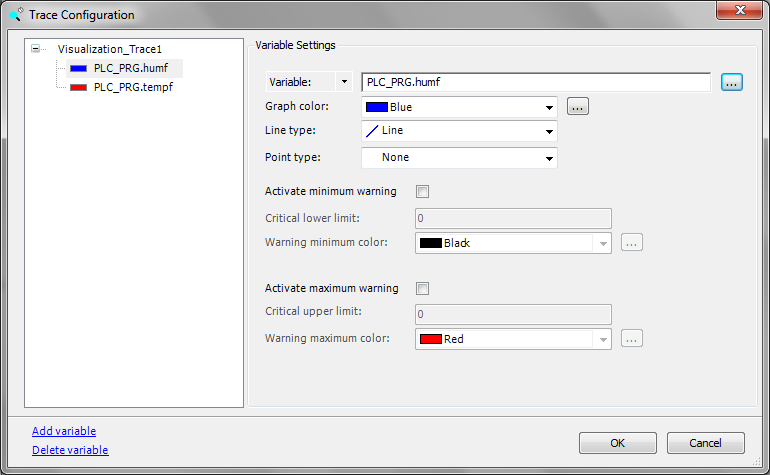
Right-click onto the coordinate system and select „Configure Trace“. Select: „Visu_Task“ under Task.
Further select the variable to visualise with „Add variable“.
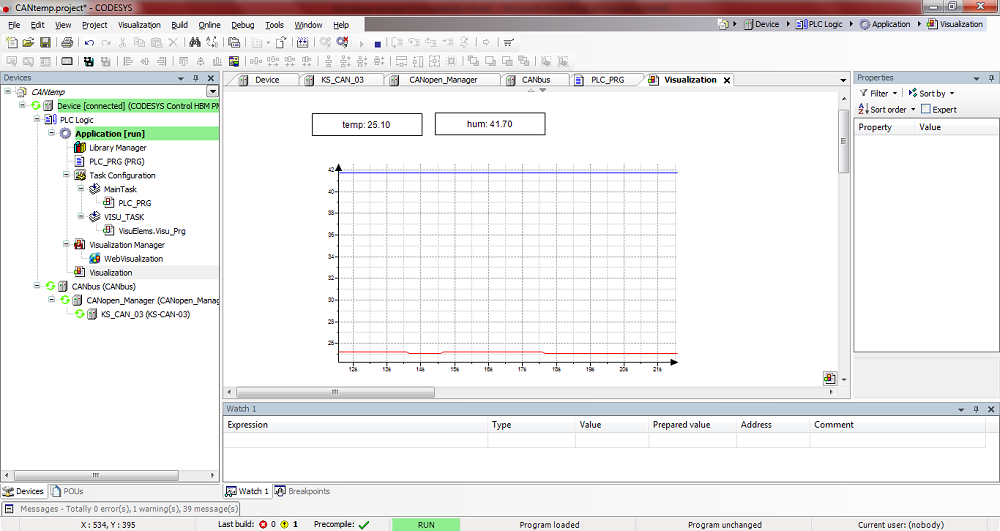
The visualisation can now displayed in Codesys via the the browser.
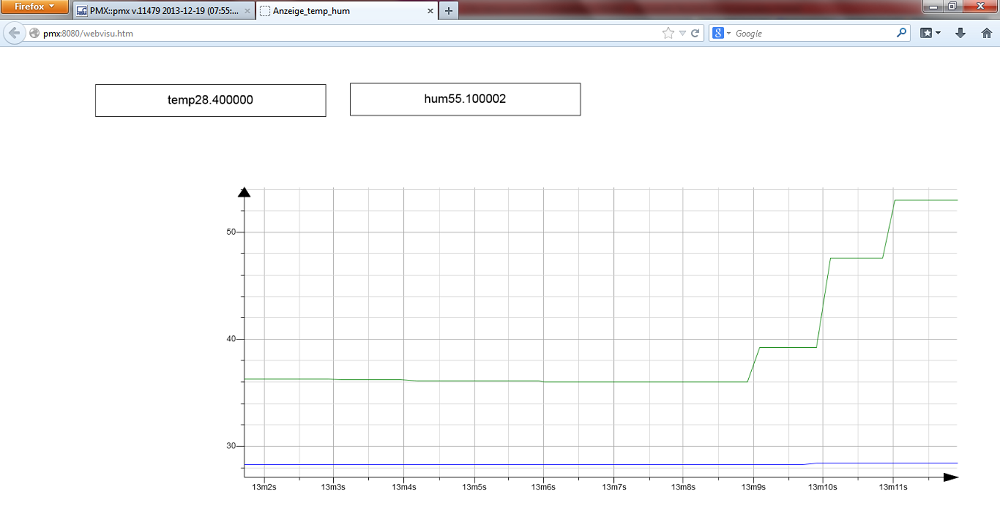
To open the visualisation in the PMX-browser, click onto the Codesys icon in the left corner below. A new opens with the visualisation.

TIP
Further information and help with creating Codesys programs is available from the Codesys online Help, on the Internet at https://www.codesys.com/ or in the Codesys chat room https://forum.codesys.com/
Benefit from the knowledge and information available in the Codesys Store. You'll find many examples of programs and solutions there, covering a wide range of tasks https://store.codesys.com/
Disclaimer
These examples are simply for the purpose of illustration. They cannot be used as the basis for any warranty or liability claims.