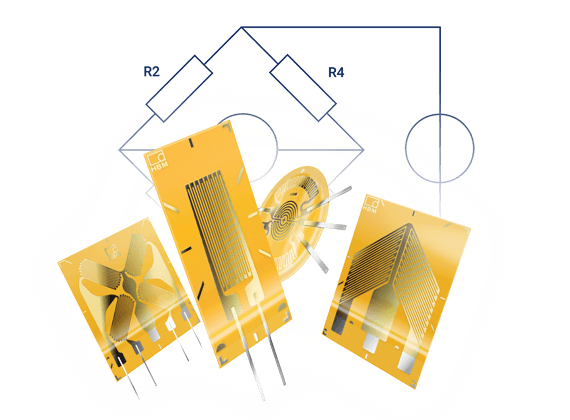
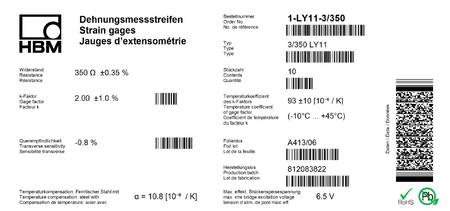
Illustration: Strain gauges datasheet
Why an exact parameterization of an electrical strain gauge measurement strain is so essential
The gauge factor is a proportional factor between the measured strain and the relative change in the bridge that can be measured by a suitable device supporting Wheatstone bridges, such as QuantumX MX1615B from HBM.
In general, the gauge factor of electrical strain gauges depends on the grid material and varies around 2.0 (Constantan, used in HBM’s Y-Series) and 2.2 (Modco, used in HBM’s M-Series).

If a wrong gauge factor is set by the software, the strain measurement won’t be precise as a consequence. This is why each HBM strain gauge batch or package shows the individual gauge factor.
The following experiment shows the error a wrong gauge factor generates.
Let’s take a measurement chain that consists of a linear electrical strain gaugeLY41-3/120, 3-wire connection to the bridge amplifier module MX1615B and software from HBM. The following test is performed at room temperature.
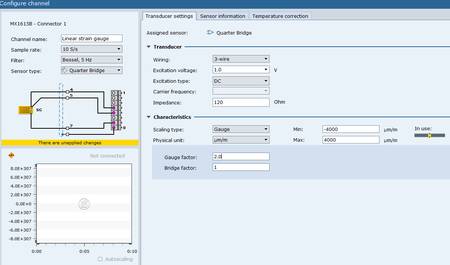
For the first trial, the gauge factor is set to 2.0.
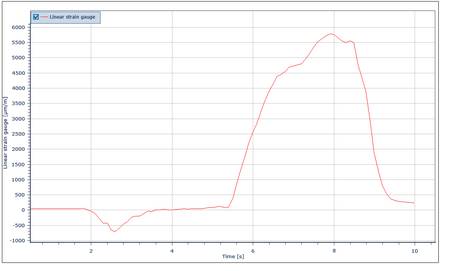
The strain gauge is installed on a bending beam and the following signal is created.
As described, the gauge factor of a strain gauge varies slightly from its batch. It’s important to store your strain gauge data sheet, including the gauge factor, or you can save all the data in your sensor database (as true digital data or / and a complete PDF file). At first glance, it seems that 2.0 or 2.06 doesn’t make a big difference but the following experiment shows that we obtain a significant measurement error by not considering the correct gauge factor.
For this test, two strain gauges of the same lot are installed, one Wheatstone Bridge channel is parameterized with a gauge factor of 2.0 and the other one with 2.06. For low strains, we can more or less see an overlap of the two graphs. If the strain is higher, there is a clearly visible offset of the result.
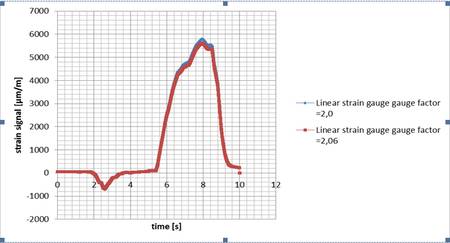
Looking closer at the measurement signal, it’s directly visible that this offset is not negligible.
With a gauge factor of 2.0, a strain of 5784µm/m (~0.578% strain) is measured while with a gauge factor of 2.06, a strain of 5618µm/m (~0.562%) strain is measured. This corresponds to a difference of 166µm/m!
In terms of relative measurement error, this implies 2.8%.
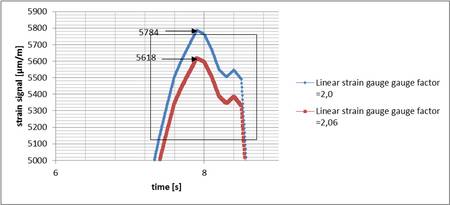
This experiment shows that an accurate measurement needs correct parameterization. This is valid too when it comes to ambient or installation influences like measurement spot temperature, contact resistance, ambient temperature around the wires, and device and electro-magnetic overall interference to the strain gauge and wiring.
