Calibrando a Cadeia de Medição Calibrando a Cadeia de Medição | HBM

Force washers must always be pre-stressed during mounting. This also applies for CFW piezoelectric force washers. After mounting, the force washers work in the force shunt, i.e. a part of the force no longer passes through the sensor but instead through the pre-stressing device, for example the pre-stressing elements CPS.

The measuring chain's sensitivity varies depending on the pre-stressing device's design. For example, when HBM's CPS set of pre-stressing elements is used, the CFW piezoelectric force washers' sensitivity is reduced by 7-12 %. After mounting, the force washers should be calibrated to allow reliable sensitivity determination.

Calibration using calibrated force transducers

One method of calibrating sensors is to use calibrated force transducers. This requires a force transducer and, in addition, an amplifier. Strain gauge-based reference force transducers (C18, Z30A series) are particularly well suited to this approach.

Force transducers for industrial applications, like for example S9M from HBM, can also be used.

When choosing the reference transducer please consider that the accuracy you will be able to attain later cannot be better than the precision of your calibration which in turn is determined by the reference measuring chain's accuracy.

Three steps for calibrating the measuring chain

As already mentioned above, a measuring chain comprising piezoelectric force washers (CFW) as sensors always needs to be calibrated when the sensor has been mounted. This means that the mechanical mounting conditions should not be changed after the calibration procedure. This applies to pre-stress in particular.

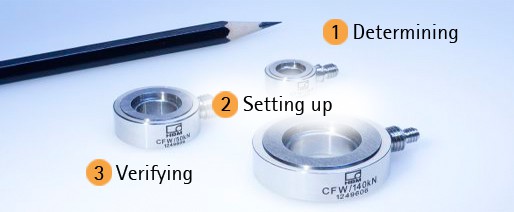
Three steps need to be taken to calibrate a measuring chain:

  • Determining the sensor's sensitivity after mounting: The force in N, a mass in kg or similar is measured simultaneously with the charge generated by the piezoelectric force washers at this force. The sensitivity can now be easily calculated by dividing the charge by the force (sensitivity = charge/force).
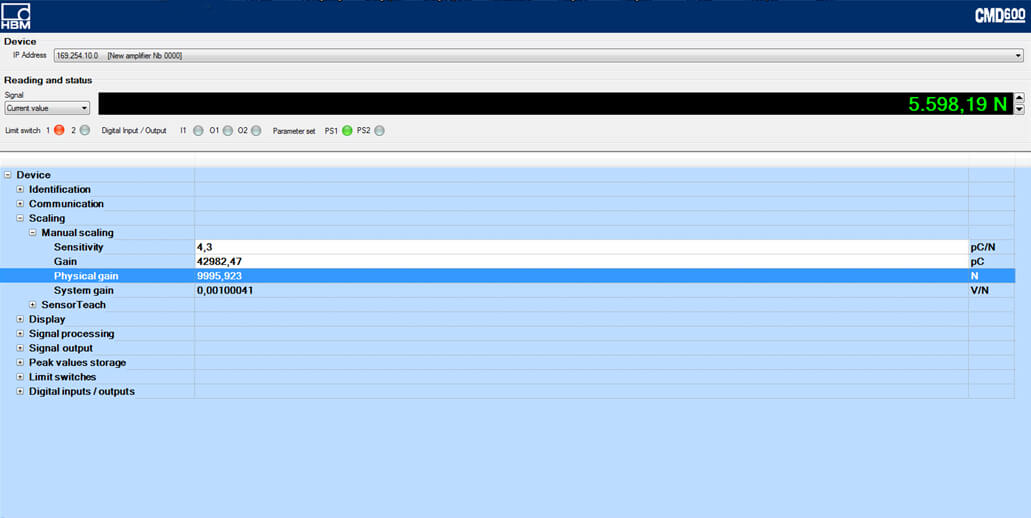
  • Setting up the charge amplifier: The measuring range and gain of the CMD600 digital charge amplifier are freely adjustable. The sensitivity calculated as described above needs to be input in the Assistant software. A reasonable measuring range should be set to guarantee optimal resolution.
  • Verifying the adjusted parameters: Finally, we recommend that you once again compare the measuring chain to the reference measuring chain.

In the following sections of this article we assume that your sensor has been mounted and adequately pre-stressed. The pre-stress can be directly measured using the force washer. A manufacturing certificate has been included for this purpose. Adjust the sensitivity on the CMD600 as required and increase pre-stress to the desired value. Minimum: 10% of the force washers nominal (rated) force.

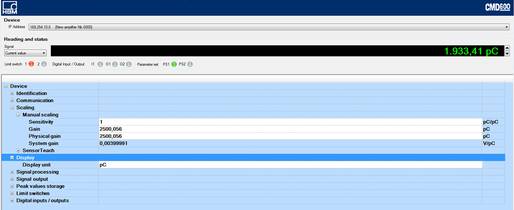
When using the CMD600 charge amplifier, connect it to a PC and use CMD Assistant for configuration. Please observe the CMD600 operating manual. Set the sensor's sensitivity to 1, the unit to pC. Using this configuration, the amplifier measures the charge in pC.
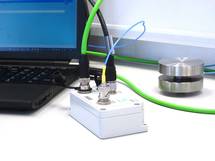
Configure the CMD as described above: The sensitivity is 1 and you measure the sensor signal in pC. This is how to start the calibration procedure.
Step 1: Determining the sensor's sensitivity after mounting

Connect the sensor to the charge amplifier. Make sure that the entire measuring chain has the same temperature as its environment. It is essential to make the calibration only after the charge amplifier has operated for two hours to preventrunning-in processes.

Position the reference force transducer such that the entire force flows through it (preventing force shunts).

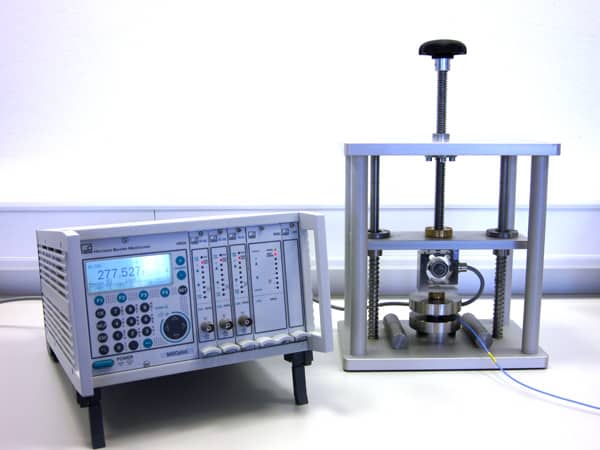
An example of force washer calibration. The strain gauge-based force transducer is in line with the pre-stressed CFW. An MGCplus amplifies the signal provided by the S9M that is used as force sensor. When extremely high demands on precision are made, we recommend using reference transducers. The CFW force washer has been pre-stressed and the load is applied to it at the same time as to the S9M force transducer. However, this is only an example. In practice, there are many calibration methods, for example, using weights or generating the force with the machine that is to be monitored with the CFW (presses, welding machines, etc.).

It is also important to choose the correct measuring range. For this purpose, multiply the force you want to use for calibrating the measuring chain by 4 pC/N. This is a customary sensitivity value for piezoelectric sensors installed in the force shunt. Add about 20 % to the result and enter this charge value in CMD Assistant as the physical measuring range. In our example above, calibration is made at approximately 500 N; with 4 pC/N sensitivity we expect a signal of approximately 2000 pC (4pC/N * 500 N = 2000 pC). We set the measuring range to 2500 pC.

The force used for calibration should not be less than 30 % of the maximum force that is to be measured with the CFW to ensure adequate accuracy. It is essential to prevent overloading of the sensors. Reset the piezoelectric measuring chain and tare the reference measuring chain immediately before starting the reference measurement.

Apply a load to the measuring device and measure the force using the reference measuring chain. The charge will be simultaneously displayed on the PC screen running CMD Assistant.


The sensor's sensitivity is now calculated as follows:

You can of course also make similar calibrations for measured quantities other than force (mass, torque, etc.)

In our example, we get the following result:

Using a series CMA amplifier we recommend calibrating the entire measuring chain. For this purpose, directly measure the charge amplifier's output voltage. The resulting measuring chain sensitivity is:

Step 2: Setting up the amplifier

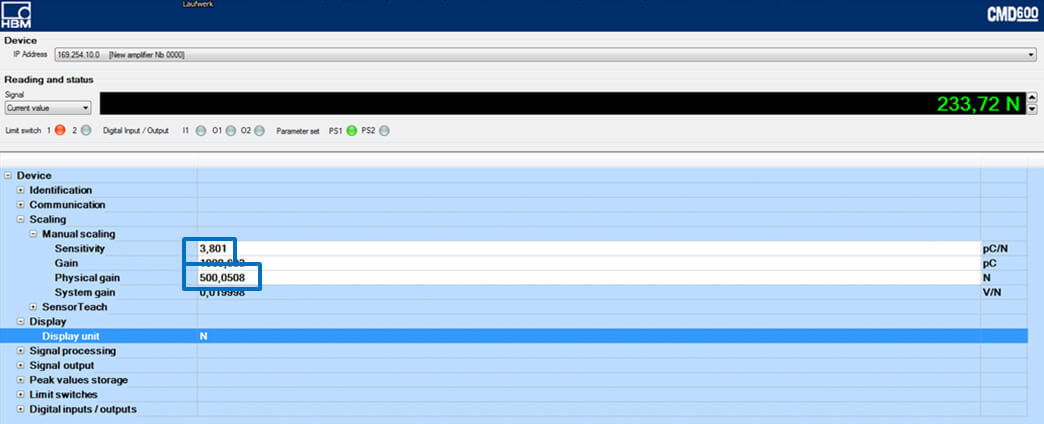
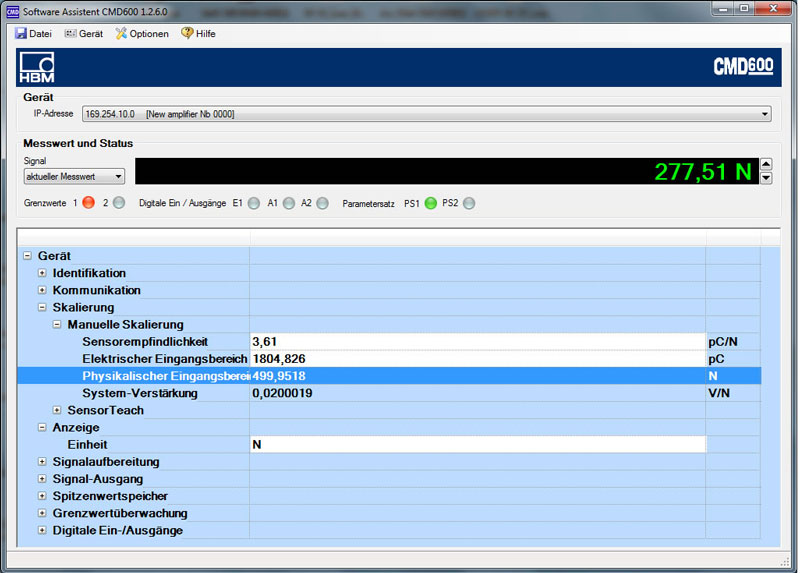
The sensitivity can now be entered in CMD Assistant. To do so, use the "Sensor sensitivity" field.

Then you can define the "physical input range". This is the measuring range. Enter here the maximum force you want to measure. Should a higher force value be present later, the CMD can no longer output it to the voltage output.

When using a series CMA analog charge amplifier, scaling needs to be performed on the subsequent electronics.

Step 3: Verification

After having made all settings, we recommend that you once again make a comparison to the reference measuring chain. Load the measuring device once again and compare the two measuring chains.