Tech note: How to use the CMD adjustment assistant Tech note: How to use the CMD adjustment assistant | HBM

How to adjust a sensor with CMD charge amplifier

This is an instruction for adjusting a sensor with a CMD charge amplifier. The adjustment assistant is especially useful if a sensor is not calibrated, or assembled in a construction, for example as force bypass. Therefore mainly tensile compressive force transducers are used. After the adjustment the sensitivity of the measurement chain is saved as two-point-scaling in the amplifier.

Start the adjustment assistant


Before starting the adjustment assistant, enter the physical unit, e.g. N for force, and apply a reset/operate process. Then go to “Scaling” -> “Setting up a measurement chain” -> “Run”. The adjustment process starts now.

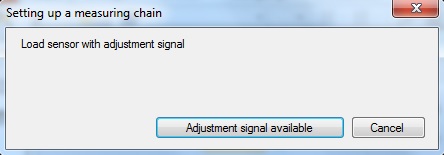
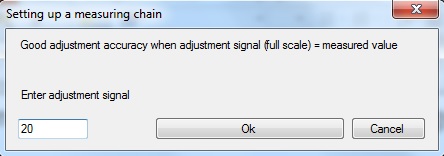
Step 1: Enter adjustment signal

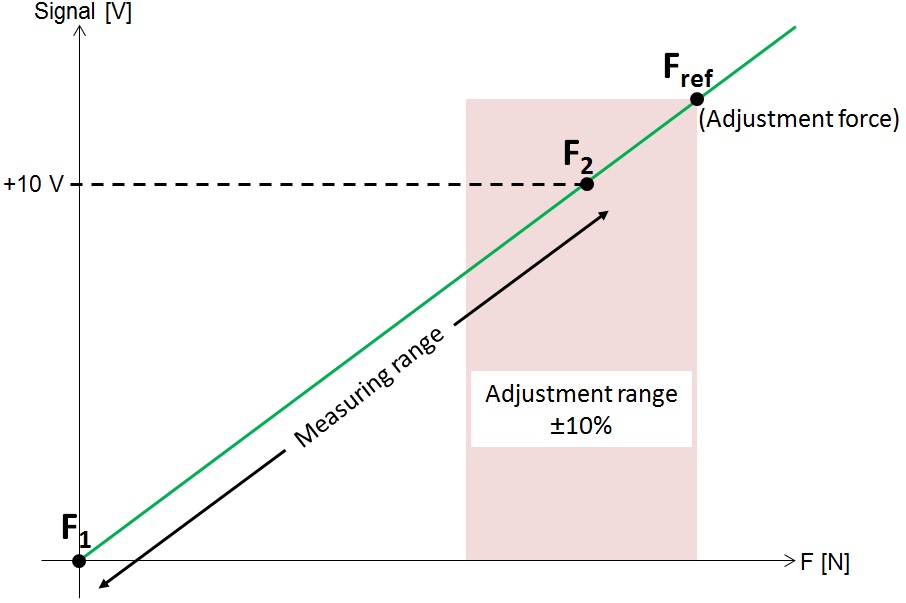
Enter the reference value here that should load the sensor. In the best case the reference value is a bit above the peak value of the measuring setup (about 10%). A lower reference value is also possible; however it is not the best choice for highest accuracy.

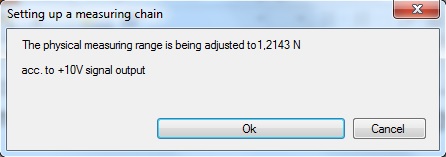
By confirming with “Ok” the following settings are used for the adjustment:

  • Sensitivity = 1
  • Unit of the display = pC

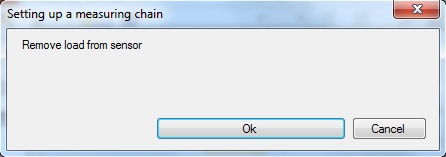
Note: The adjustment assistant can be canceled at any time. The previous settings are restored then


Step 2: Unload sensor

Completely unload the sensor and confirm by clicking “Ok”.

Step 3: Load sensor

Load the sensor with the reference value entered before.

Step 4: Enter measuring range

Enter the measuring range at maximum output voltage (+10V).

Step 5: Confirm measuring range

The assistant asks for a confirmation of the measuring range.

The assistant has now calculated the sensor sensitivity and the measuring range. The physical unit is set back to the default value.

Disclaimer

These examples are for illustrative purposes only. They cannot be used as the basis for any warranty or liability claims.