Traceable
- ISO 17025 certification
- Direct traceability to the German National Metrology Institute (PTB)
- Assessment of the calibration laboratory by independent experts at regular intervals
The HBM calibration laboratory offers many advantages when it comes to calibrating your torque transducer:

Benefit from calibration certificates with minimal measurement uncertainty, directly traceable to the National Standard.

Optimize your measurement uncertainty assessment using the actual transducer characteristics - instead of data sheet specifications only.
Choice of different calibration standards:

Measurement chain or sensor? DIN 51309 to meet the highest demands or VDI/VDE 2646? It's your choice. We will be happy to advise you!
Go to the accreditation certificate
If you want to know everything about your sensor:
Calibration in accordance with DIN 51309 requires measurements using the sensor in three varying mounting positions. In other words, the sensor is rotated by 120° in the machine in each case i.e. the torque transducer needs to be mounted and dismounted thrice.
The following characteristics are obtained from a DIN 51309 calibration and specified in the calibration certificate:
Furthermore, the calibration certificate specifies the measurement uncertainty as defined in DIN 51309.
This calibration provides guaranteed proof that your torque sensor is traceable measuring equipment (as required by ISO 9001).
Conformity assessment: HBM will identify whether a torque sensor is outside the data sheet specifications.
Best price-to-performance ratio with guaranteed traceability
Calibration in accordance with VDI/VDE 2646 requires two series of measurement in one mounting position (as opposed to DIN 51309). The following sensor characteristics are obtained from this calibration and specified in the calibration certificate:
This calibration provides guaranteed proof that your torque sensor is traceable measuring equipment (in accordance with ISO 9001).
Conformity assessment: HBM will identify whether a torque sensor is outside the data sheet specifications.
HBM also offers a working standard calibration with individually selectable load steps.
The following sensor characteristics are obtained from this calibration and specified in the calibration certificate:
Our recommendation: We recommend calibration in accordance with VDI/VDE 2646 that, at the same price, provides you with more information about your torque sensor than the working standard calibration.
HBM offers the calibration of alternating torque in accordance with DAkkS-DKD-R 3-5.
The following sensor characteristics are obtained from this calibration and specified in the calibration certificate:
We will be happy to advise you.
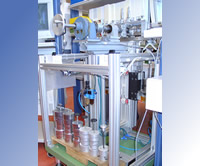
0.2 N·m to 20 N·m
For working standard calibration.
Uncertainty of torque representation:
Torque steps: 0.2; 0.4; 0.5; 0.6; 0.8; 1.0; 1.2; 1.6; 2.0; 2.5; 3; 4; 5; 6; 8; 10; 12; 16; 20 N·m
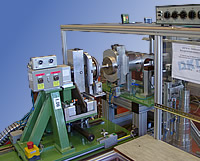
2 N·m to 200 N·m
for DAkkS and working standard calibration.
Uncertainty of torque representation:
Torque steps: 2; 4; 5; 6; 8; 10; 12; 16; 20; 25; 30; 40; 50; 60; 80; 100; 120; 160; 200 N·m
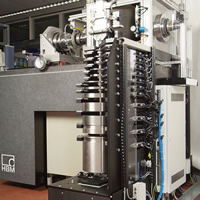
5 N·m to 1000 N·m
for DAkkS and working standard calibration.
Uncertainty of torque representation:
Torque steps: 5 N·m to 1000 N·m in steps of 1 N·m each.
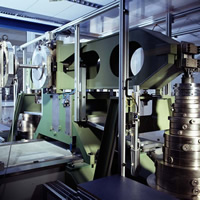
50 N·m to 20 kN·m
for DAkkS and working standard calibration.
Uncertainty of torque representation:
Torque steps: 50; 100; 150; 200; 250; 300; 400; 500; 600; 800 N·m; 1; 1.2; 1.6; 2; 2.5; 3; 4; 5; 6; 8; 10; 12; 16; 20 kN·m
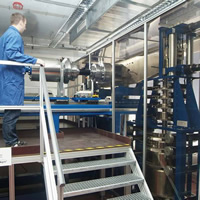
100 N·m to 25 kN·m
DAkkS and working standard calibration.
Uncertainty of torque representation :
Torque steps from 100 N·m to 25 kN·m in steps of 100 N·m each.
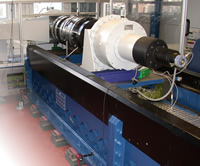
500 N·m to 50 kN·m
for working standard calibration.
Uncertainty of torque representation:
Torque steps: 500 N·m to 50 kN·m
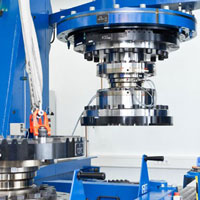
3 kN·m to 400 kN·m
for DAkkS and working standard calibration.
Uncertainty of torque representation:
Torque steps: 3 kN·m to 400 kN·m in steps of 1 kN·m each.
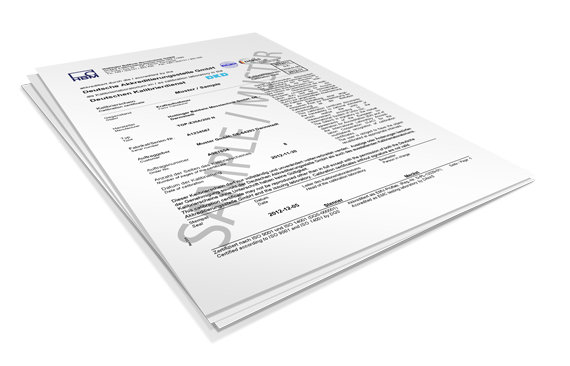
You want to have a look at our calibration certificates? Sample calibration certificates for all measured quantities covered by the HBM calibration laboratory can be downloaded as PDF file.