Measurement and traceability of torque on large mechanical drives Measurement and traceability of torque on large mechanical drives | HBM

Measurement and Traceability of Torque on Large Mechanical Drives

Considering the wide range of possibilities for torque measurement, the method including a torque transducer calibrated at the manufacturing site with a given accuracy which refers to a documented unbroken chain of comparisons relating this torque transducer to the primary standard, ensures its traceability.

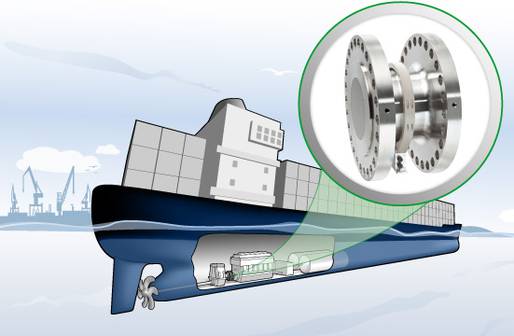
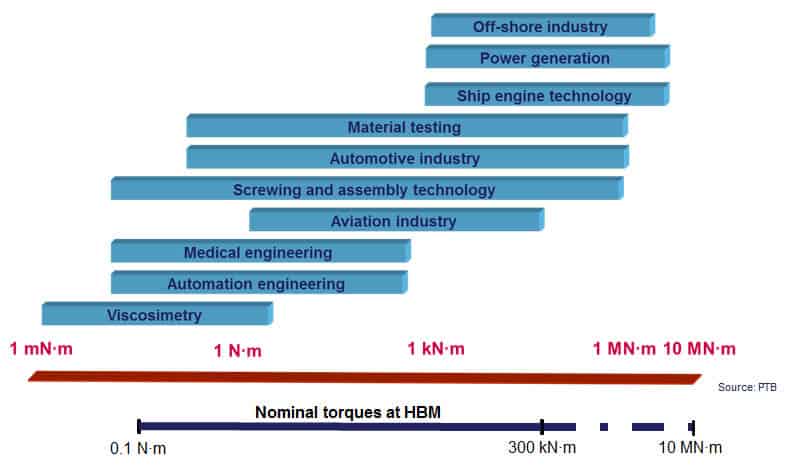
Precision measurements are essential to determine the efficiency and therefore meet the strict environmental regulations for marine engines. The optimization of marine engines based on highly accurate and reliable torque measurement, besides enabling significant energy savings, is in line with the steadily increasing requirements of international regulations, especially for marine engines with high nominal torque [1].

The drive power is simply calculated from this accurate measurement of the torque Ϻ between the generator and the drive side in the rotating mechanism and the angular velocity ω, with the formula (1):


P=ω*M              (1)


The accurate torque information allows precise control of the mechanical drive system. This enables combustion engines (e.g. multi-fuel or gas engines) to be monitored to ensure operation within their optimal working window, which helps to avoid the occurrence of knocking, misfiring, overloading, and reduces fuel consumption as well [1].
Torque can be measured directly or indirectly:

Direct torque measurement

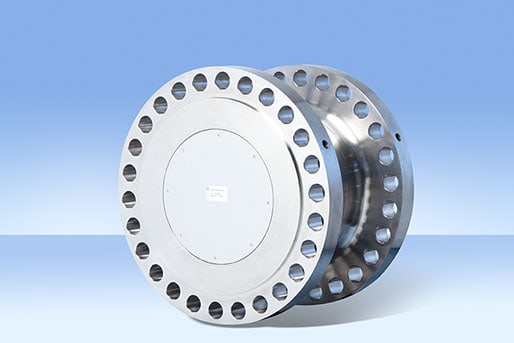
Direct torque measurement uses an inline torque transducer as an integrated part of the drive shaft (see Fig. 2). The torque transducer is already calibrated at the manufacturer’s site using appropriate calibration machines. The transducer can be easily installed, removed, replaced and recalibrated.

Indirect torque measurement

Indirect torque measurement on a cylindrical shaft involves measurement of torque-related parameters and subsequent calculation.

a) Measurement of strain on the input shaft surface. Strain gauges are therefore glued directly onto the shaft and then connected into a measuring bridge. Transfer of the measuring bridge excitation voltage and the measurement signal in both cases is contactless.

b) Another method for determining torque on a cylindrical shaft is through measurement of the torsion angle.

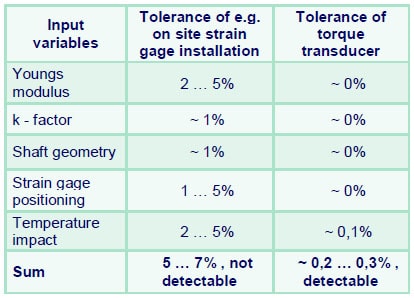
Both methods offer some advantages, as for example retrofitting of existing systems. Depending on the installation quality and the components used, the torque value to be subsequently calculated might have a relatively high uncertainty because of the tolerances (see Tab. 1) which finally leads to a relatively significant measurement uncertainty.

Calibration and traceability

To ensure the precision of the drive power or the efficiency which are essential to meet the strict environmental regulations in the marine engine industry, besides the measurement of high torque, the calibration and traceability of this physical quantity are increasingly coming into focus. Basically, the techniques used in torque calibration are subdivided in lever-arm/mass system and reference transducer.

  • Lever-arm/mass systems: A precisely defined torque is generated when the weight force of calibrated masses acts on the test specimen by means of a lever arm of known length [3].
  • The second technique in torque calibration is using a force reference transducer with a lever arm [2].
  • The third principle is a torque reference transducer which provides the reference value. Systems with torque reference transducers can use any mechanism to generate the torque which is then measured with the torque reference transducer [2].

HBM‘s new torque calibration machine

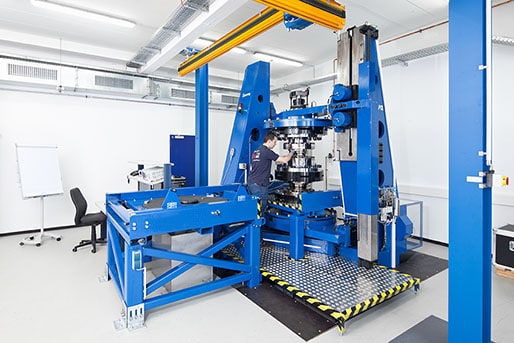
To comply with these requirements, the new calibration machine (see Fig. 3) uses a torque reference transducer which provides the reference torque.

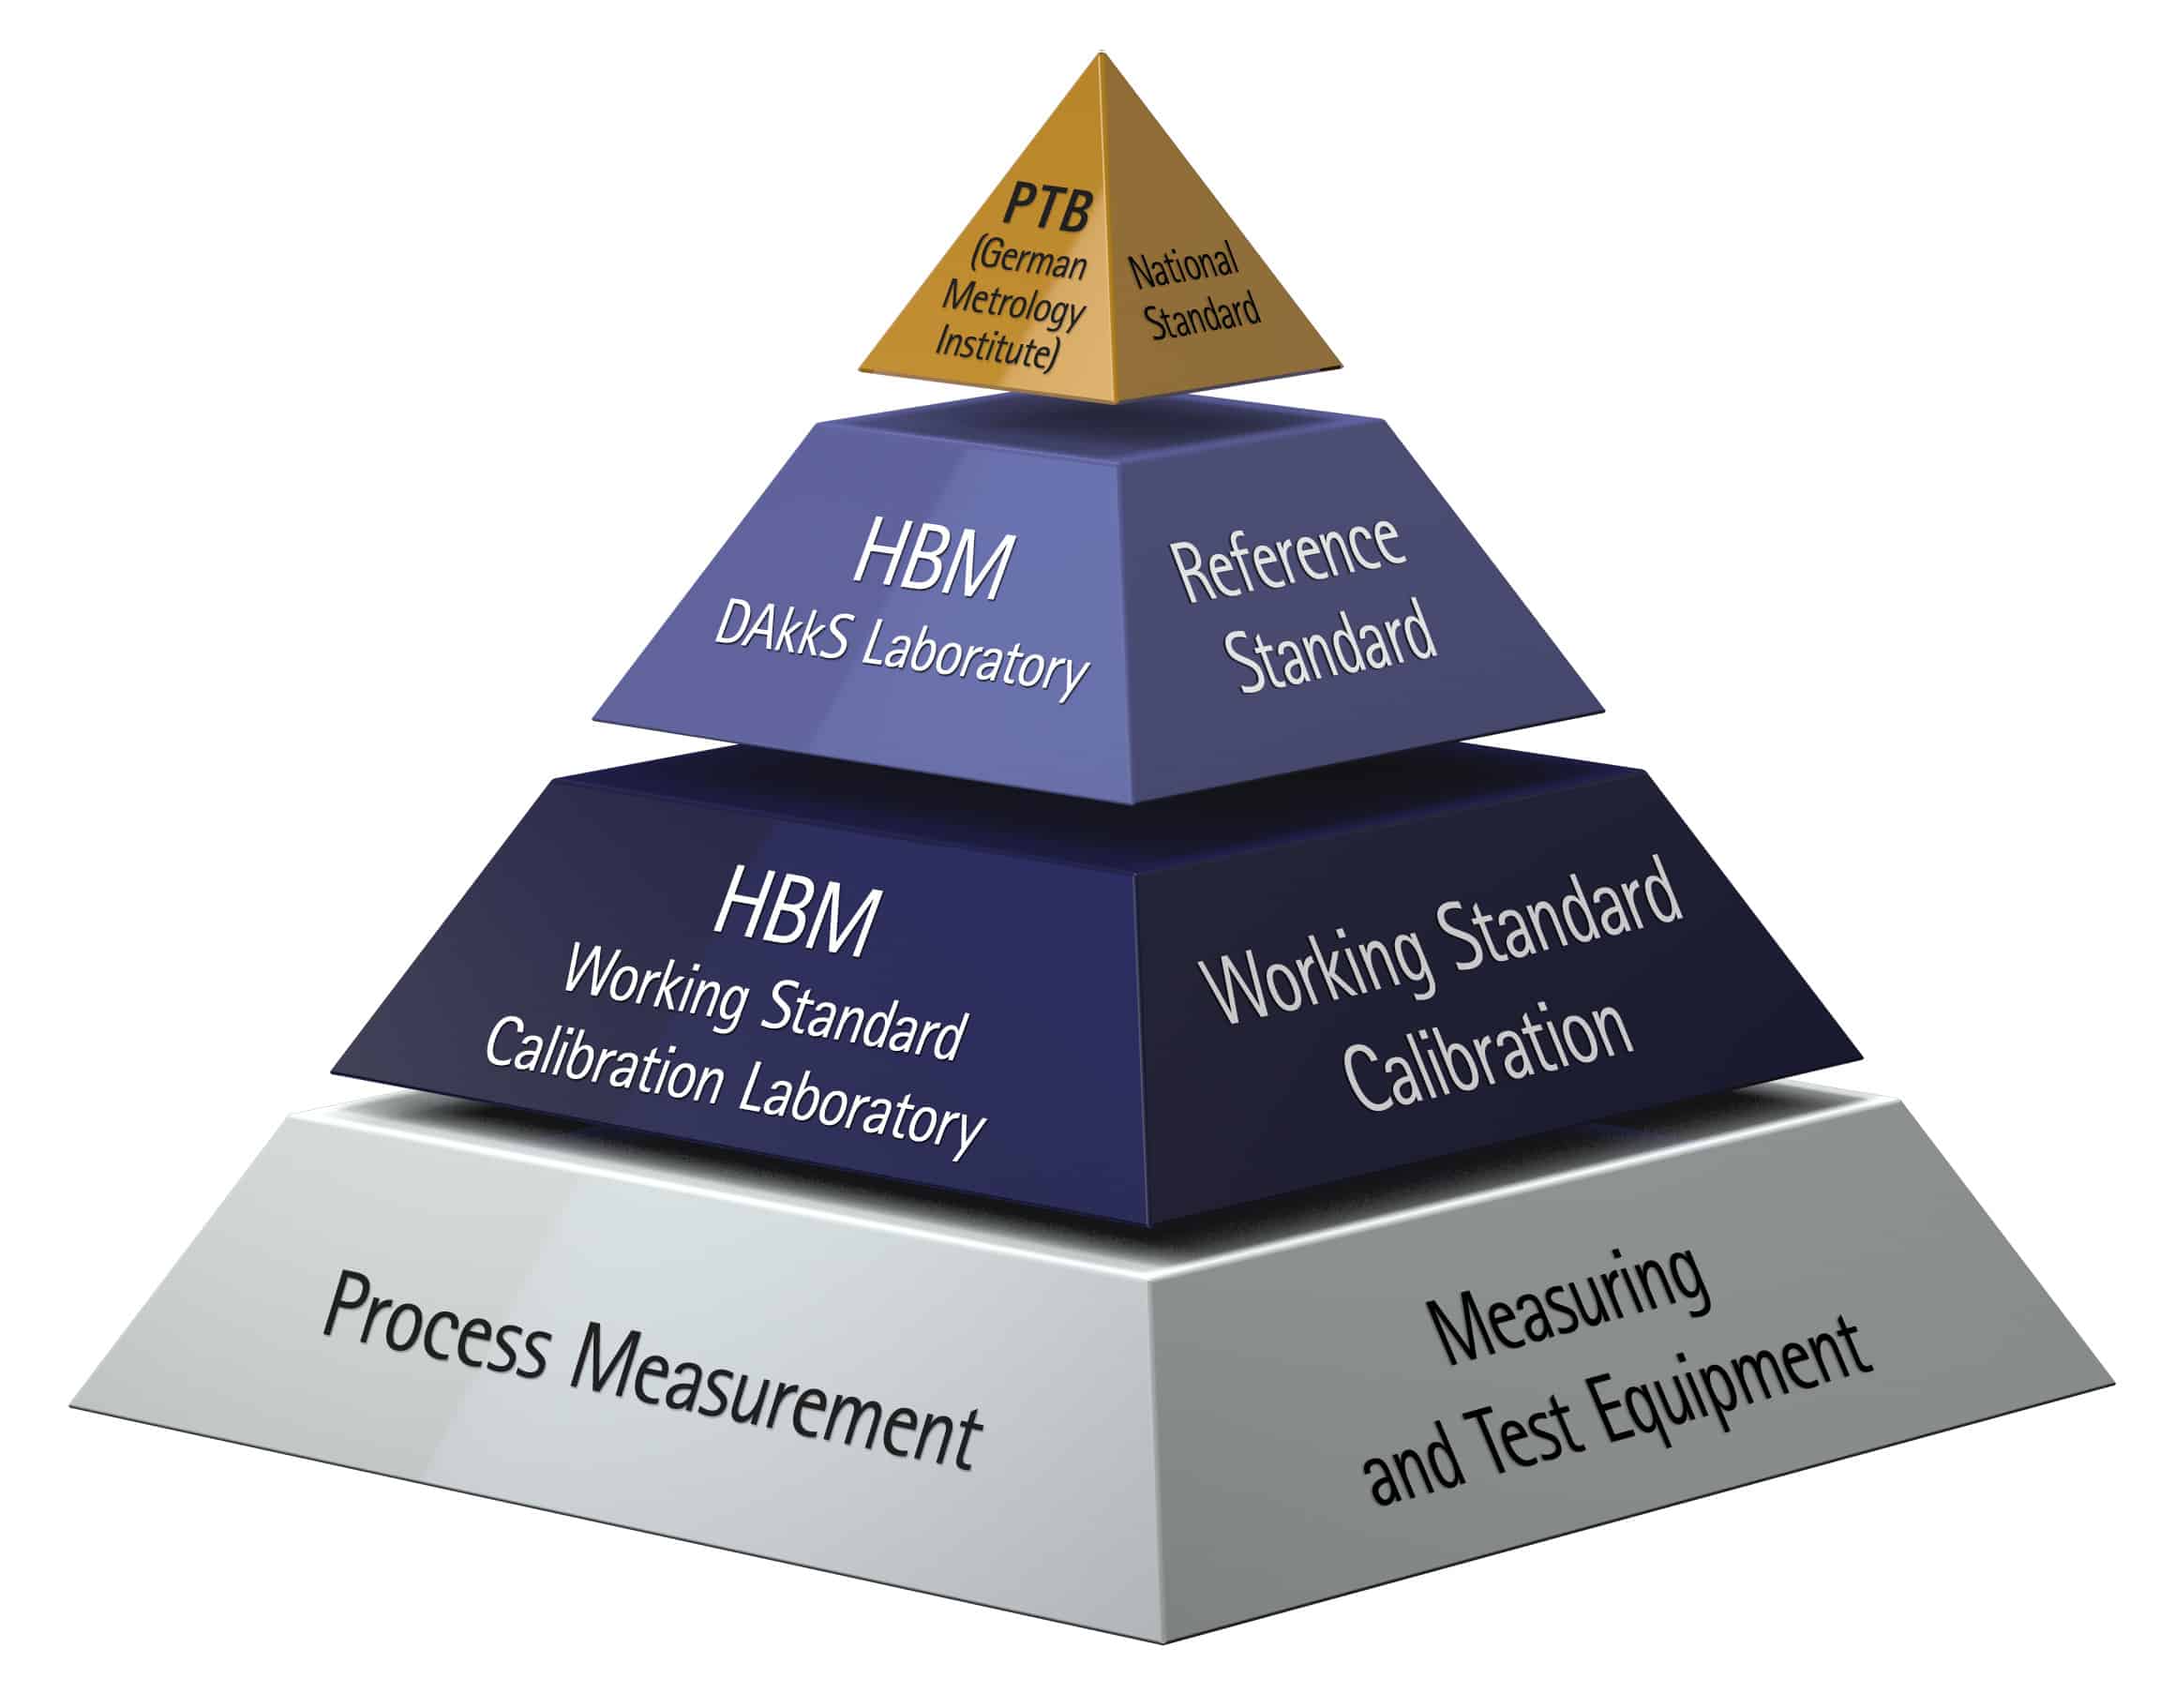
Modified T10FH/150 kN•m and T10FH/400 kN•m torque transducers were chosen as reference transducers. Due to the two precision reference transducers, a measurement uncertainty of 0.1 % could be achieved. The main contribution to the remarkable uncertainty results comes from the documented unbroken chain of comparisons relating these torque transducers to the reference transducer of the German National Standard (see traceability pyramid, Fig. 4).

The measurement uncertainty of the German National standard, the highest ranking calibration machine with 1.1 MN•m also referred to as “torque standard machine” owned by the PTB, to which this new 400 kN•m calibration machine is traced back, is 0.08 %.

This precision of the torque sensor enables to measure torque and therefore to calculate power and efficiency with an accuracy that is at least 10 times better than required by current environmental regulations for the marine industry.

References

[1] K. Weissbrodt, Direct torque measurement on large drives with very small tolerances, Paper Hottinger Baldwin Messtechnik GmbH (2011)

[2] R. Schicker and G. Wegener, Measuring Torque Correctly. Bielefeld: Hottinger Baldwin Messtechnik GmbH. (2002)

[3] Davis, F.A. The 1st UK National Standard Static Torque Calibration Machine-New Design Concepts Lead The way. Measurement Science Conference in Anaheim, USA. (2002)