Device-synchronization via NTP-time-protocol Device-synchronization via NTP-time-protocol | HBM

PMX time synchronization with NTP

The following example shows the synchronization of a PMX System and a QuantumX via a NTP-Server (time master). The NTP-Server can be installed on the computer with catman (during the setup of catman the menu “install NTP time server” shows up). The PMX and QuantumX devices receive a parallel Input Signal in this example, generated with SweepGen.

Requirements

All devices must be found in the same Ethernet network. The quality of the network directly determines the performance of the synchronization.Transducer cables in carrier frequency technique should not be installed next to each other.

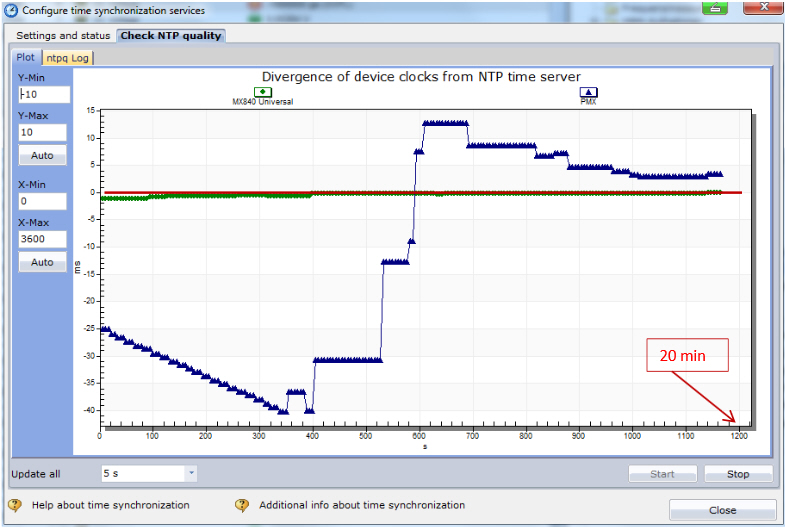
Settling time – After starting the system, all clients and the time server need some settling time. Depending on the network it can take up to 30 minutes with a new set of devices. The measurement system and the dedicated NTP-Server should run continuously in order to achieve best results. As soon as the system got used to itself, the settling time can reach an accuracy level of < 1 ms within 2 minutes.

Accuracy is described by the two values:

  • Offset: average deviation from time server
  • Jitter: typical variation range of the offset

In a good synchronized system offset values lower than 1 ms can be reached. We recommend a sampling rate of 1,200 measurement values per second.

Filter – Use identical filter settings in all devices, in order to avoid the displacement of phase of these digital filters. The time variation of different filter settings are typically higher than the offset effect of the devices are. Check the filter characteristics and frequencies after choosing the sampling rate.

Equipment

  • 1 x PMX-System (incl. supply)
  • 1 x QuantumX (incl. supply)
  • 1 x Switch (incl. supply)
  • 4 x Ethernet-cable
  • 1 x cable for signal input


(Optional) to setup an external time server:

  • 1 x GPS-NTP-Time-Server (incl. supply)

Wiring

After PMX, QuantumX and the switch are connected to their supplies, the devices can be connected to the switch via Ethernet cable. The switch is connected to the computer via another Ethernet cable. The external signal is put in parallel on the input channels of the PMX and the QuantumX at the same time.

Update the System in advance to the operation

Make sure to use catman (Version 3.5.1 or higher). Furthermore PMX and QuantumX shall run with the latest firmware.

Update the registryeditor

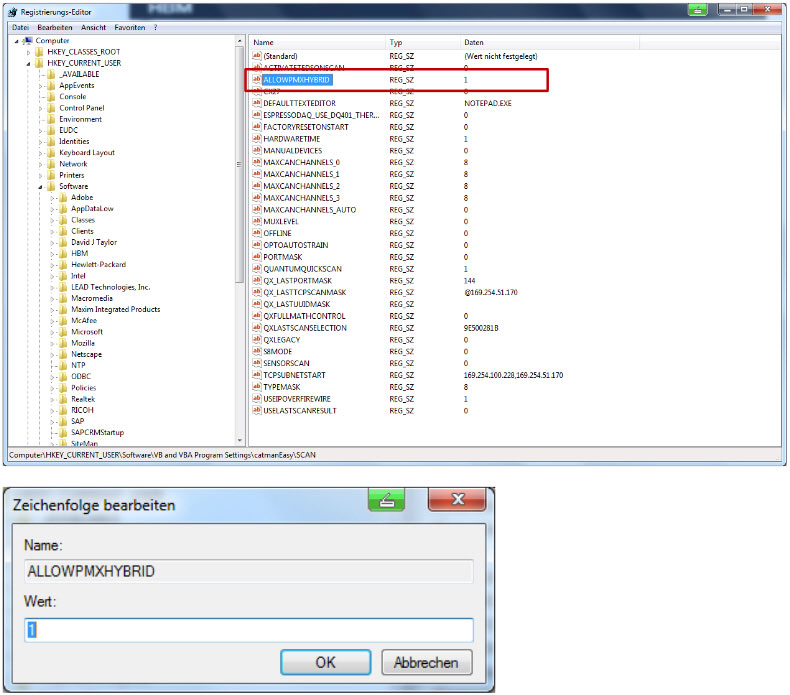
Make sure the registry file „ALLOWPMXHYBRID“ contains the value 1.

Open the registrys editor (Windows-Search: „regedit“).

The folder REG_SZ is found on the following path: HKEY_CURRENT_USER\Software\VB and VBA Program Settings\catmanEASY\SCAN

Background: Only if the value1 is set in the registry file, using a hybrid system (PMX and another device) is possible. If the value is not set opening a new project will lead to an error.

Find out IP - Addresses

QuantumX

In order to find out the IP address of the QuantumX, open a “new project” in the main catman window. All applicable devices are shown. A connected QuantumX System is shown with its IP address. Remember this IP address.

PMX

In order to find out the IP address of the PMX, open the PMX in the web browser with pmx/. In the path Settings/system/devices the IP address of the PMX is shown. Remember this IP address.

Application

Pre Setup

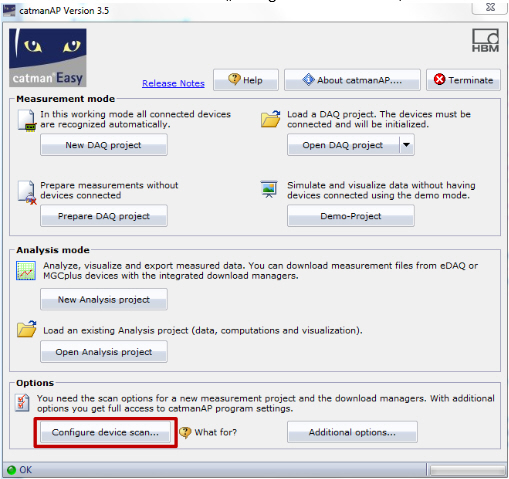
Start catman. Choose the button „Configure device scan...“, in order to select the devices that shall be synchronized.

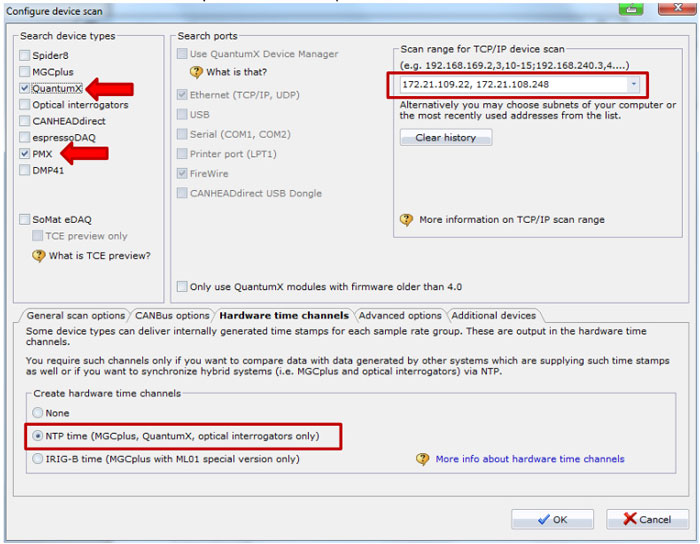
In the following overview select the devices you want to synchronize (here: PMX and QuantumX). Enter the IP addresses of the devices in the field “Scan range” on the right hand side. In the tab “Hardware time channels” below, set “NTP time” which sets the required time channels up.

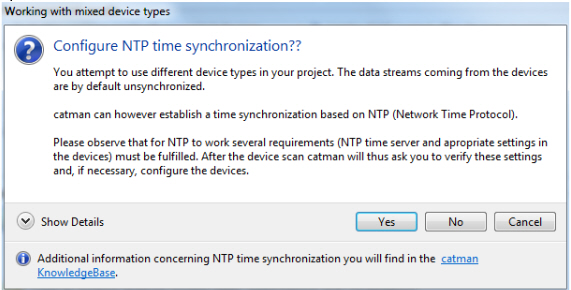
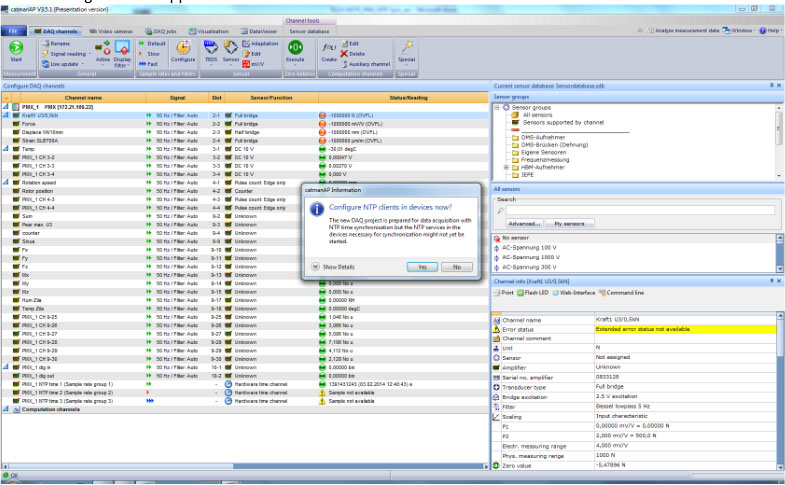
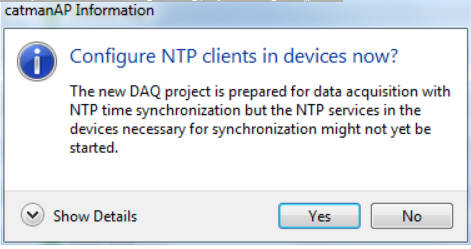
Start a „New DAQ project“ in the catman main window. The following dialog shows up because catman realises a hybrid system:

Confirm the dialog with „Yes“.

The following overview appears:

Postpone the following dialog, by clicking on „No“:

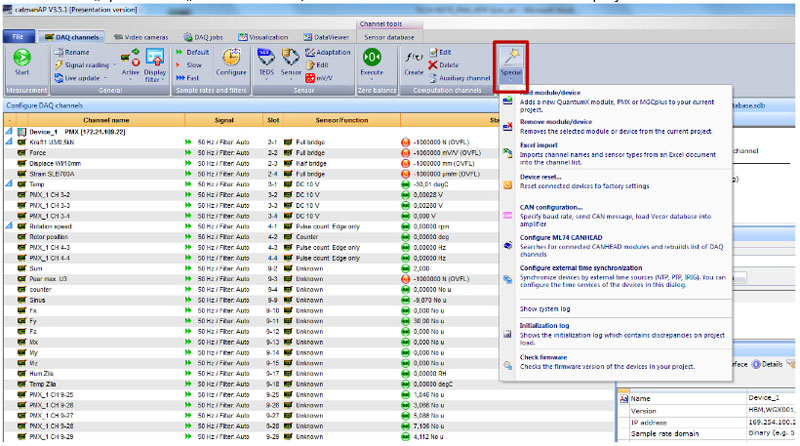
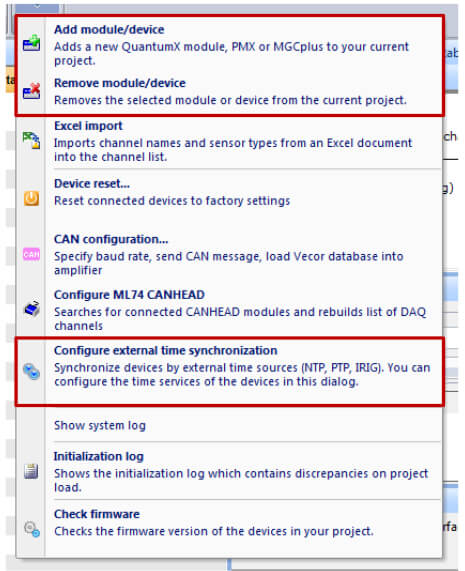
Via the menu „Special“ and „Remove module/device“ delete all devices from the current project.

The overview will look like this now:

Add devices

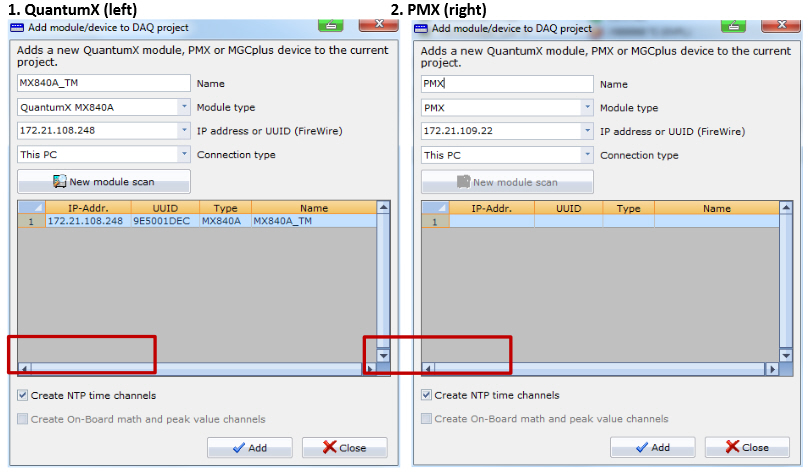
Via the menu „Special“ add the required devices again („Add module/device“):

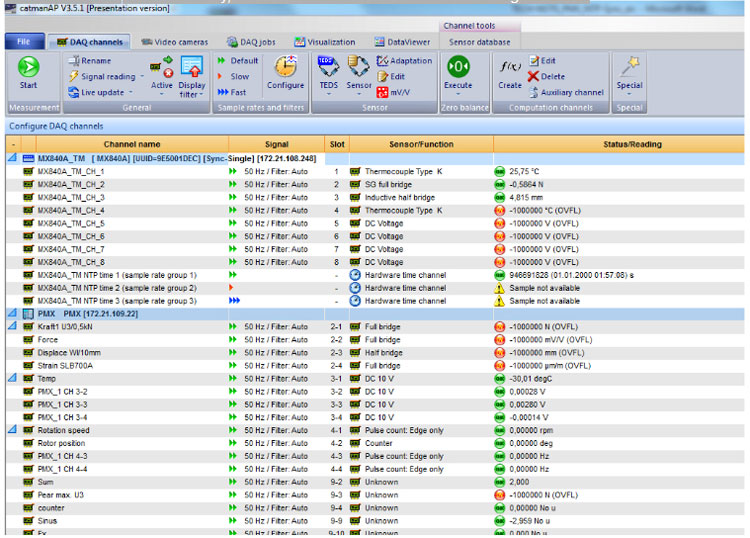
If the devices are added correctly, the overview will look like shown in the figure below:

The figure shows a hybrid system of a QuantumX and a PMX. Now the time synchronization can be set up.

Setup of time synchronization

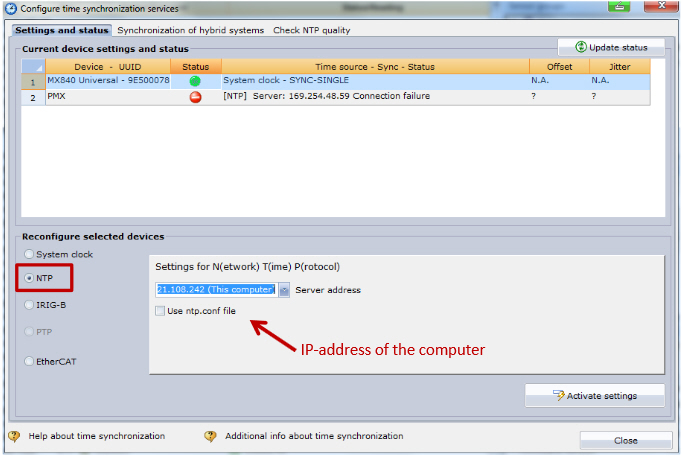
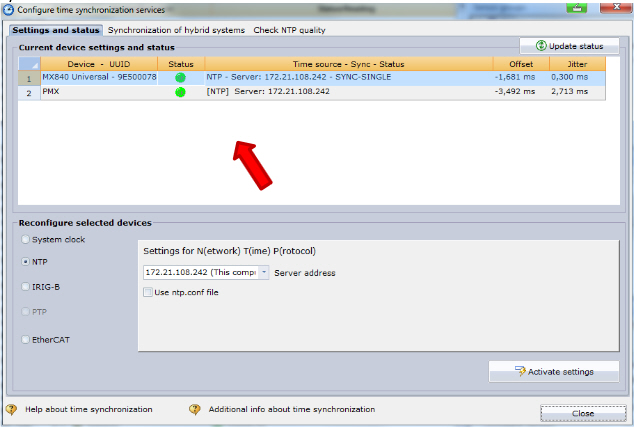
In the menu „Special“ choose „Configure External Time Synchronization“. This leads to the following window:

By default “system clock” is selected. All devices must be set to “NTP” together with an identical server address. The default IP-address is the one catman is running on.

The QuantumX needs a reboot, in order to apply the changes. Catman is running this reboot an d shows the status. This can take up to 2 minutes.

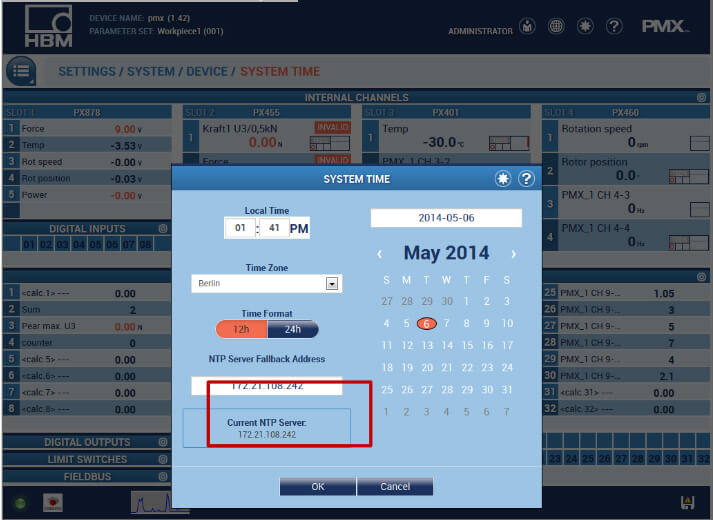
Because the PMX is not synchronized yet, open the web browser and go to the system time settings as shown below. Set the fallback IP address of this computer.

The PMX session shows the following dialog:

Close the Dialog „Configure External Time Synchronization“ and open it again, as shown below the system time is synchronized now.

Check NTP - Quality

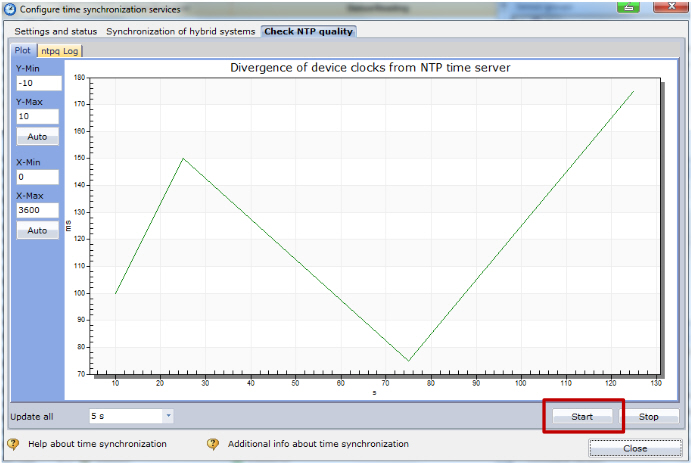
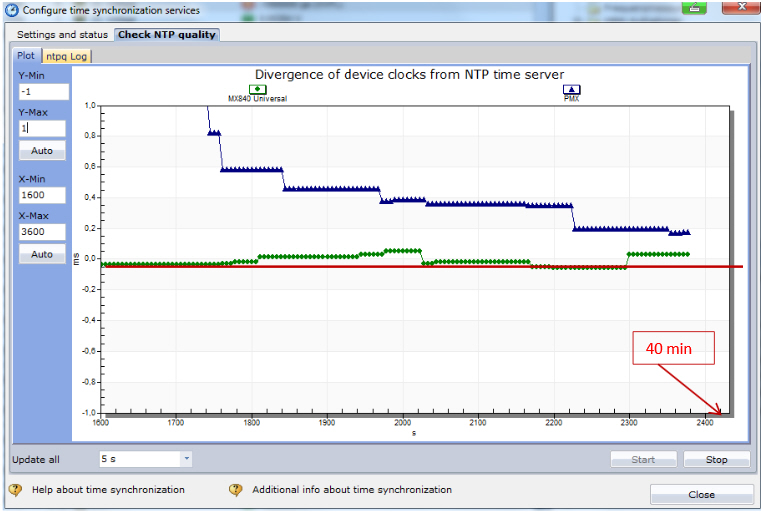
The Tab „Check NTP quality“ can check the variation of the time variation. Start the test by clicking on „Start“.

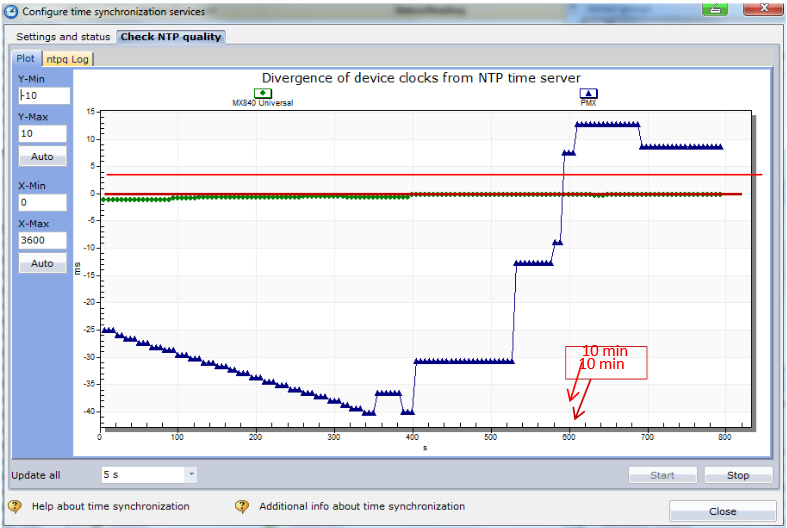
The Test needs some time. The curves however should approximate the value 0. Below the variation between the devices over time is shown.

Signal synchronization

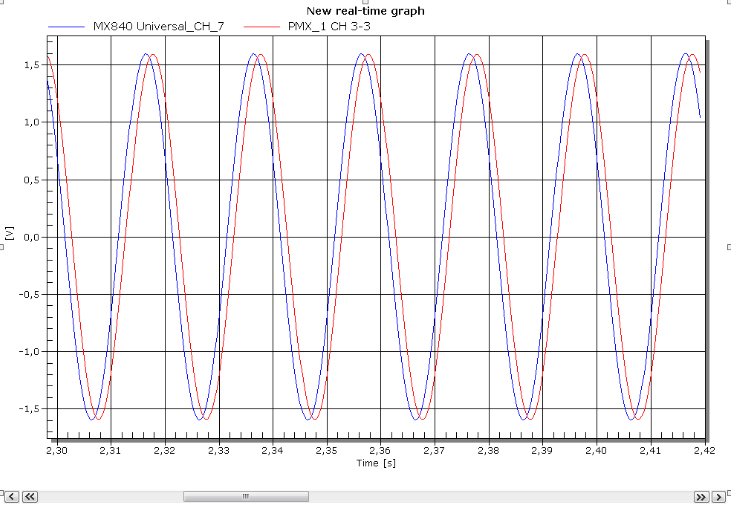
The Screenshot below shows a well synchronized System (Jitter: 2ms). A Sinus signal with 50Hz is measured

Tips

You can check whether the local NTP time server, which can be installed with catman, is running on the computer. Search for the folder “Meinberg” in the windows start menu, open the program “Quick NTP Status” as shown in the figure below. The window shows whether the NTP time server is active. Further delay, offset and jitter can be checked.

Please check the filter settings of the channels in catman to avoid aliasing-effects.

Disclaimer

These examples are simply for the purpose of illustration. They cannot be used as the basis for any warranty or liability claims.