Start Simatic-manager/TiA-portal and open the demo project (DemoKoff), transfer it to the PLC and start it.
Start STEP7 SIMATIC Manager.
This short example considers a simple configuration demo for the PMX amplifier connected to a Siemens PLC type S7-315-2 PN/DP.
The PMX is equipped with ProfiNet interface PX01PN (Slot 0) and measuring boards PX878 slot1, PX455 slot 2 (strain gauge sensors e.g. force) and PX401 slot3 (analog signals +/-10V or +/-20mA).
Use RJ45 cable to connect the S7-315-2 ProfiNet interface to the PMX ProfiNet interface board PX01PN slot0. Power on both devices.
Start Simatic-manager/TiA-portal and open the demo project (DemoKoff), transfer it to the PLC and start it.
Start STEP7 SIMATIC Manager.

In this case, the S7 unit with MAC address 00-1B-1B-16-DD-47 is selected (address can be found on the device). Then an IP address has to be assigned to the PMX in the "Set IP configuration" section. The following addresses are used:
IP address: 172.19.169.178
Subnet mask: 255.255.0.0
Click the "Assign IP Configuration“ button.
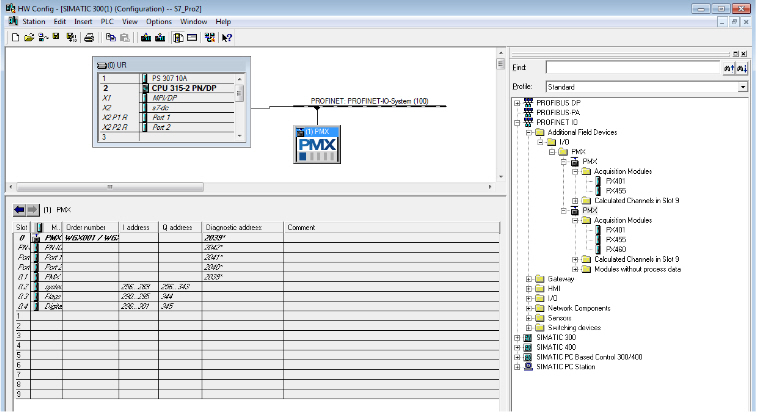
Click "Additional Field Devices" to select and add the suitable PMX.

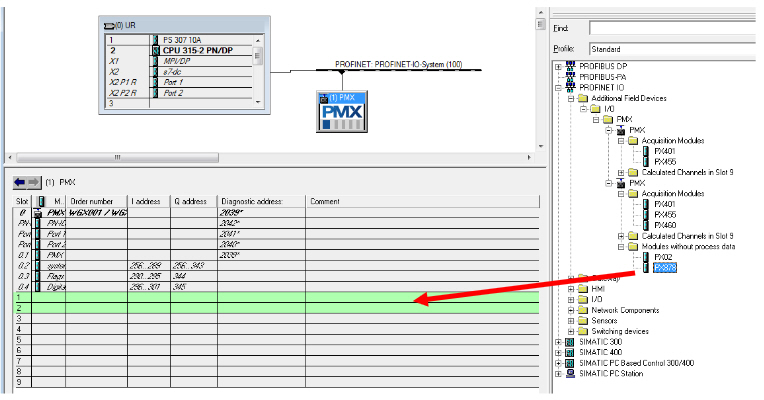
To add the measuring cards to the different slots, drag one of the measuring cards from the menu tree on the right-hand side to one of the slots highlighted green on the left-hand side (see example: PX878 measuring card).

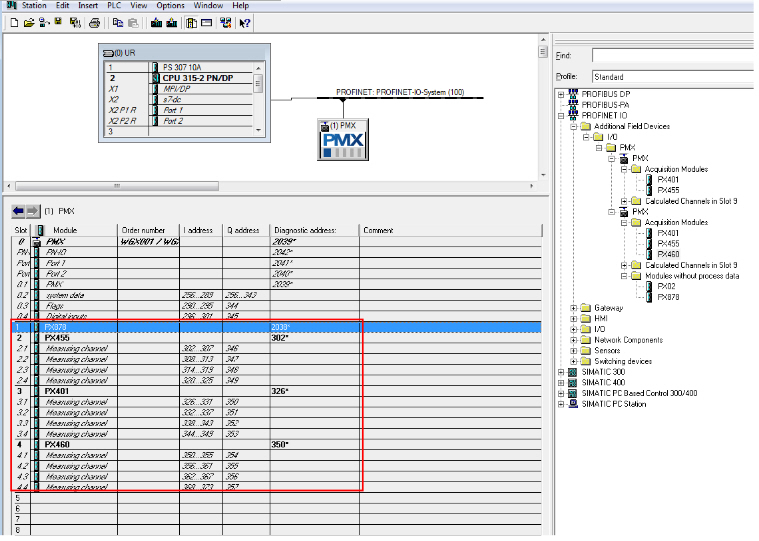
In our example we get the following view:

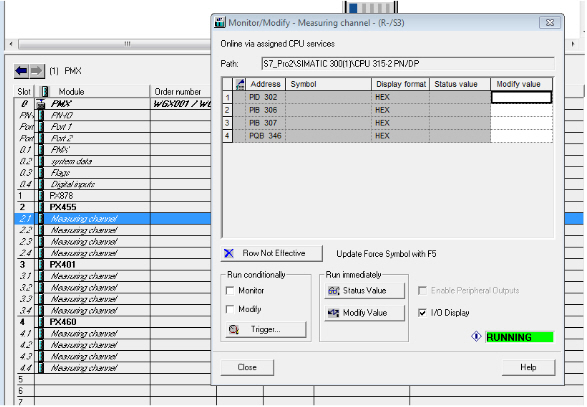
Right-click on one of the channels to open the "Monitor/Modify" dialog.

The example given is intended to illustrate the integration of PMX with Siemens PLC using Siemens Siematic Manager or TiA-Portal. This example does not imply any warranty orguarantee.